To add an item from a product database to your quote, select the Products -> Lookup menu. This will display the Product Lookup window.
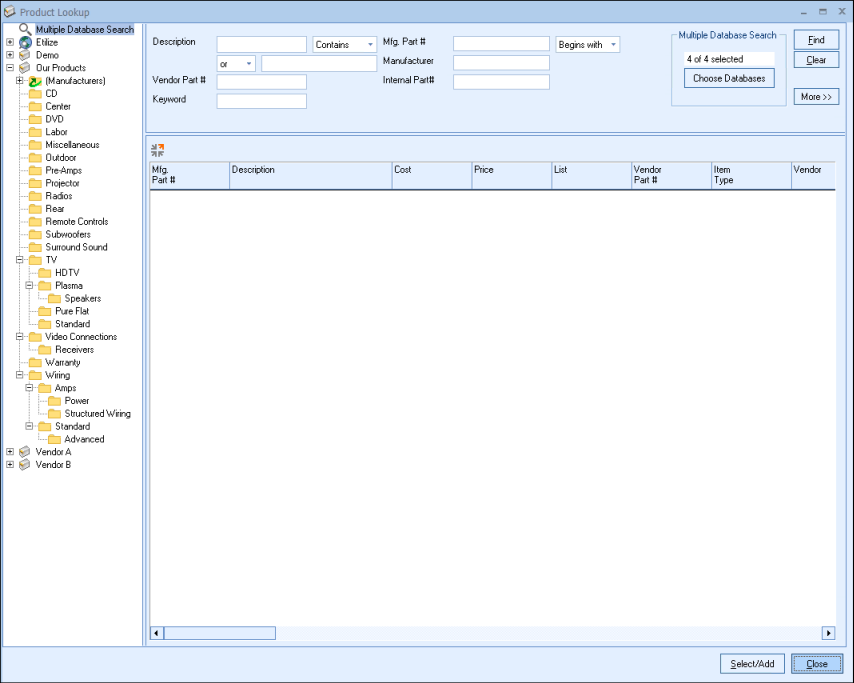
The Product Lookup window is the center of all product database operations. In the upper left corner, you'll see a list of product databases that have been set up or linked to, including the Multiple Database Search option. You can cycle through the available Product Data Sources by using the keyboard letter corresponding to the Product Data Source name.
Pressing F5 on your keyboard will also refresh the item lists in the Product Window to refresh any changes to the items or databases that were made outside of QuoteWerks.
The Multiple Database Search allows users to search all of the native and linked product sources at one time (those databases are listed below the Multiple Database Search option). Users can choose to search all the listed databases or only a select few by clicking on the [Choose Database] button (located in the upper right of the Product Lookup window).
Once selected, search fields will be available that you can use to find an item. Type the search criteria into the appropriate search field. You can type information into more than 1 search field at a time. When you have finished entering the search criteria, click on the [Find] button and QuoteWerks will search for matching items in the selected product databases. The results of the search will then be displayed. If there were no matches, there will be nothing displayed in the Search Results grid.
Multiple Database Search is also available on the Quick Lookup search on the DocumentItems tab.
If you would like to clear all the search fields to start another search, click the [Reset] button. To exit the Product Lookup window, press the <Esc> key. |
You can perform an extended search by clicking on the [More] button which will list the extended fields that can be searched.
|
Search Differences between Native and External Product Sources
The Product Lookup window will look slightly different depending upon whether an external product source or a native product database is selected.
When an external product source is selected, the Sort By drop-down will not be available (although you can still sort by clicking on the column titles). Additionally, the ability to search by manufacturer, vendor, and internal part numbers may be unavailable depending on which database you are linking into.
Also, for ease of identification, external product source icons are green in color. Native database icons are yellow in color.
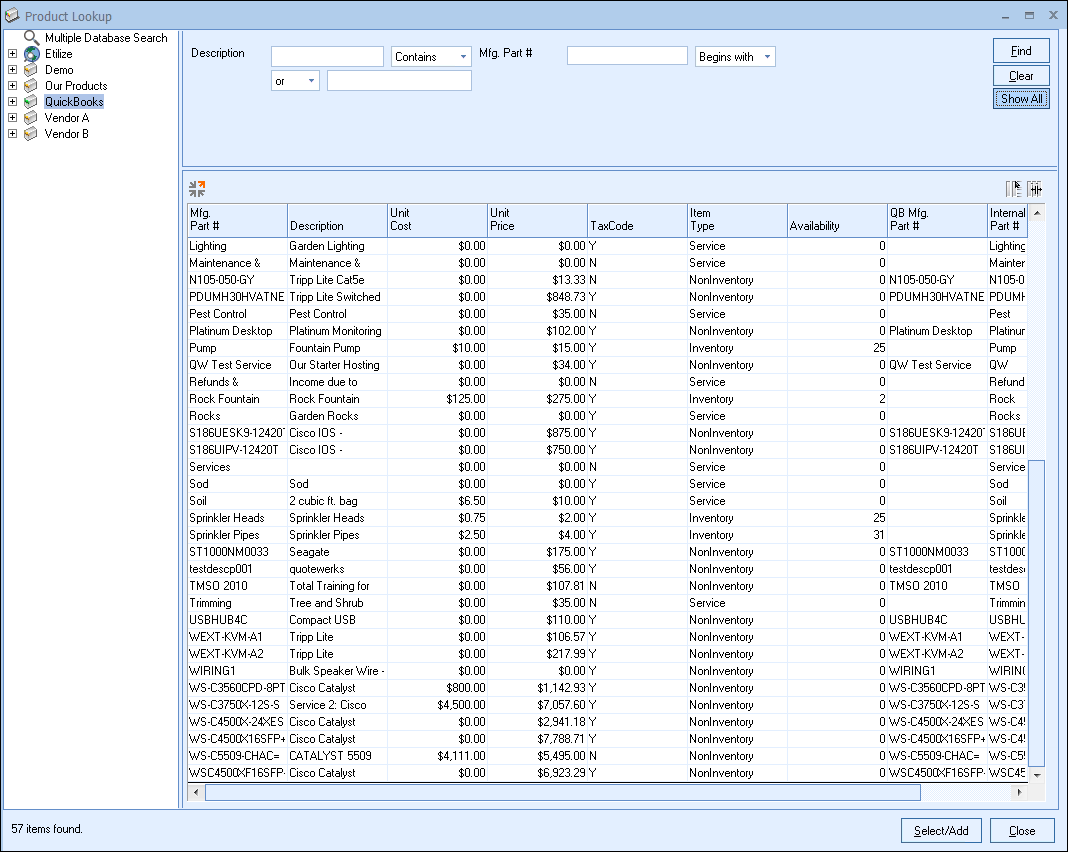
Once the product matches are displayed, you can scroll through them to find the product that you want to add to the quote. Right-click on the product to display a pop-up menu with the options listed below:
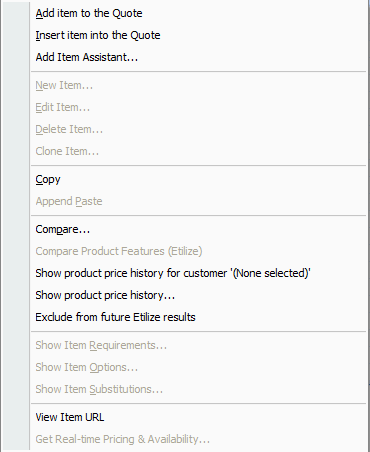
Add item to the Quote
Selecting this menu option will add the selected product(s) directly to the end of the quote.
Insert item into the Quote
Selecting this menu option will insert the selected product(s) into the quote above the current line item.
Selecting this menu option (or double-clicking on a product) will display the selected product(s) in the Add Item Assistant before adding them to the quote.
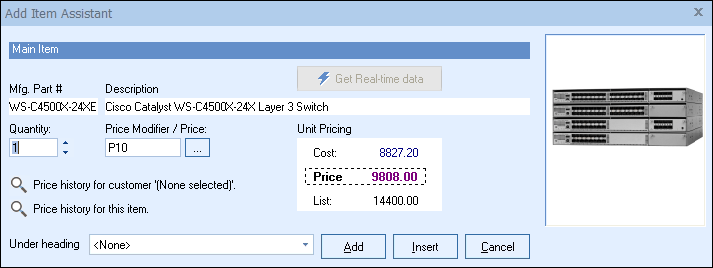
There is an option under the Tools -> My Preferences menu to enable the ‘Add Item Assistant’. If this option is checked, the Add Item Assistant window will appear after double-clicking on a product(s) or by selecting the product(s) and clicking on the [Select] button.
The Add Item Assistant will allow you to make some changes before the item is added to the quote. It will also display any picture associated with the item and any optional items that are setup for the item. Double clicking the picture will open it in the default application associated with the picture file type. You can include the optional items in the quote by clicking on the check box next to each item.
Lastly, you can choose where to place the selected item in your document by clicking on the [Append] or [Insert] buttons.
Note: If the user has the Misc Access right of “CannotSeeCostOnAddItemAssistant”, Cost will not be displayed on this window. If the user has the Misc Access right of “CannotManuallyModifyFixedPriceInAddItemAssistant” then they will be unable to change the price of the product in the Add Item Assistant window when the product simply has a ‘Fixed’ price (not price modifier calculated). If the user has the Misc Access right of “CannotManuallyModifyPriceModifierInAddItemAssistant” then they will be unable to change the price modifier of the product in the Add Item Assistant window when the pricing method is based on a price modifier (not a fixed price). |
Item Without Optional Items
Item With Optional Items
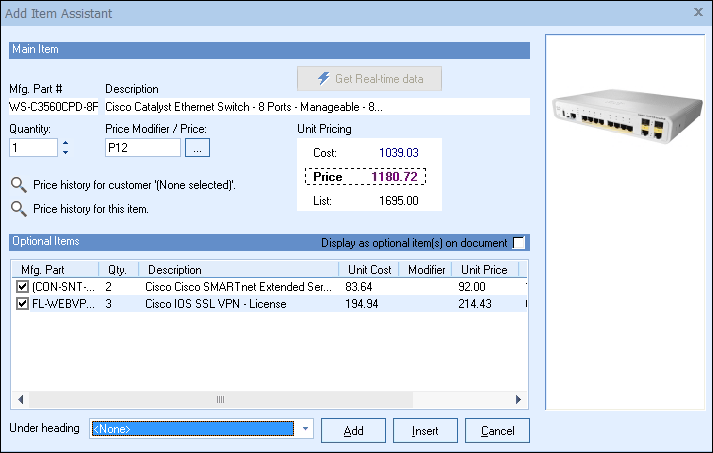
Quantity
You change the quantity before the item is added to the quote.
Price Modifier / Price
You change the price modifier such as P20, M20, D20, etc before the item is added to the quote. If you do not want to use a price modifier, and instead want to simply specify a price, you can manually type that price in here. In addition, if the Item Pricing Method is set to use Volume or Customer Based Pricing, you can click the  button to view the level details. For details on price modifiers and method, see Setting Up Native Products and Services.
Unit Pricing
The Analyze Pricing frame displays the cost, price, and list price for the item that you are adding to the quote. These values are here to assist you in making your Price Modifier selection.
Under heading
The under heading option will let users add this item to a specific section of the document. This will support any existing Section Headers or Heading items or create a new Heading or Section Header for the current open document.
Add or Insert Item
You can choose to add the item to the end of the quote, or insert it above the line item in the quote that is currently selected.
Price history for customer / Price history for this item
Clicking on the “Show Price history for Customer” will display a list of every time you have quoted this item to this customer. The “Show Price history for Item” button will display a list of every time you have quoted this item to any customer. This information is useful in deciding what price you are going to charge the customer this time. If a user has the Misc Access Right of CannotSeeCostOnAddItemAssistant, then the Cost column data will only show "n/a".
Copy
Selecting this menu option will copy the selected product(s). Once product(s) have been copied, you can paste them into your quote, or into a native product database.
To copy 1 or more products into the quote, select the product(s) and click on Copy, then switch back to the Document Items tab of the Quote Workbook. Select the line item you would like the selection(s) to be pasted above and go into the File -> Edit menu, then select Insert Paste. If you would prefer the selection(s) to be added to the end of the document, go into the Edit menu and select Append Paste. If you select Paste, the line item you selected in the quote will be replaced with the product lookup item(s) copied.
See the following Append Paste section for details on pasting into a native product database.
Append Paste
Selecting this menu option will paste the product(s) that were copied into the selected product database. This feature can be used to make copies of products in the same database, and can also be used to copy a product or products from 1 native product database, and paste them into another native product database. You can also copy products from a quote, and then paste them into the selected product database
Compare
Selecting this menu option will start the price comparison feature. See Price Comparison and Refreshing Features for details on price comparison features.
Show product price history for customer ‘Company Name’
When you are quoting a product for a customer that has been previously quoted and saved, click on that product and select ‘Show product price history for customer “Company Name”’.
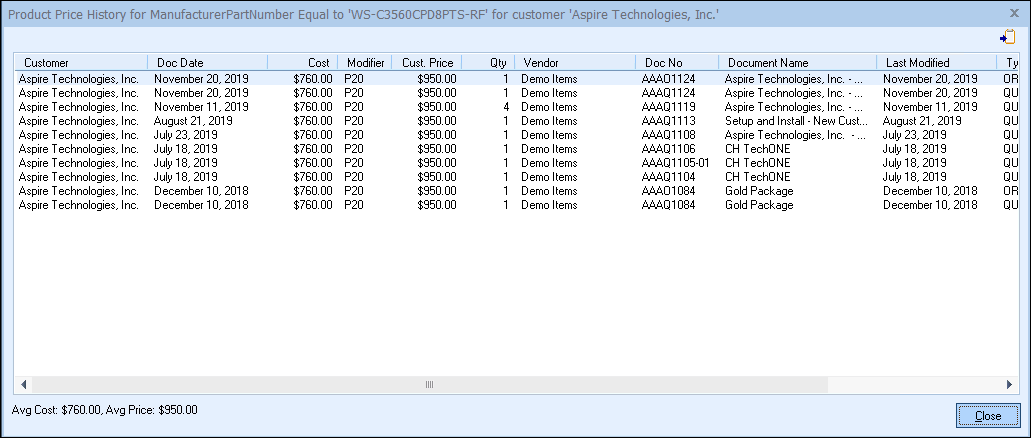
This feature allows you to track a customer’s past price history on a particular product quoted from previous quotes and will display the average cost and average price for the item as well.
Show product price history
When you are quoting a product that has been previously quoted and saved, click on that product and select ‘Show product price history.’
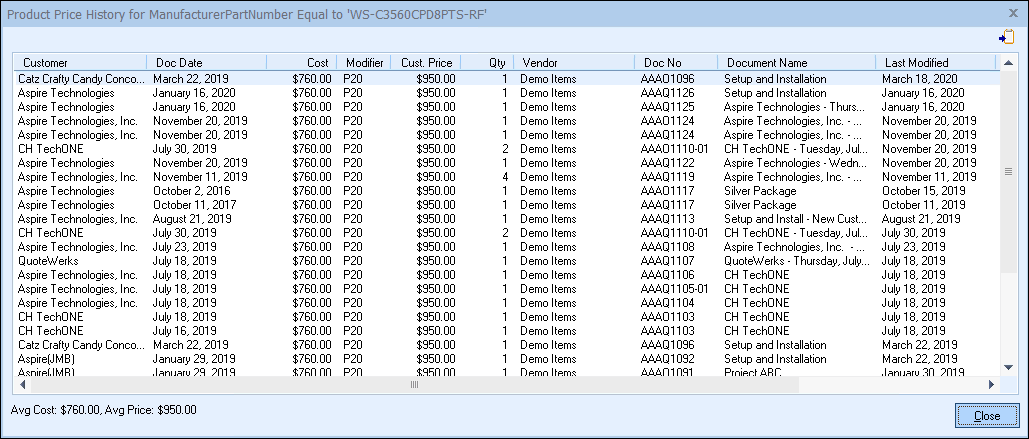
This feature allows you to track the past price history on a particular product quoted from previous quotes and will display the average cost and average price for the item as well.
Note: To view a selected quote, click on the [Open Selected Quote] button. The selected quote will be opened. Keep in mind that the results of the product price history search and customer product price history search will be limited based on the document rights assigned to the logged-in user. |
Show Item Requirements
Selecting this menu option will display a list of all products that have been defined as required items for this product. It uses the manufacturer part number to perform this search. See Required, Optional, and Substitute Item Features for details on setting up Required Items.
Show Item Options
Selecting this menu option will display a list of all products that have been defined as Optional Items for this product. It uses the manufacturer part number to perform this search. See Required, Optional, and Substitute Item Features for details on setting up Optional Items.
Show Item Substitutions
Selecting this menu option will display a list of all products that have been defined as Substitute Item for this product. It uses the manufacturer part number to perform this search. See Required, Optional, and Substitute Item Features for details on setting up Substitute Items.
New, Clone, Edit, or Delete Products
See Setting Up Native Products and Services for procedures on adding, cloning, editing or deleting products from a native product database.
View Item URL
Selecting this menu option will open the product's URL in your default web browser. For native product databases, to modify the URL, go to the Advanced tab of the Edit Product window.
Real-time Product Content
See Using OpenICEcat for details.
Real-time Pricing & Availability
See Using Real-time Pricing & Availability for details.
Related Topics: