This topic explains how to build a new basic layout in the Layout Manager.
•Adding a Document Totals Section
•Adding Content to the Bottom of a Document
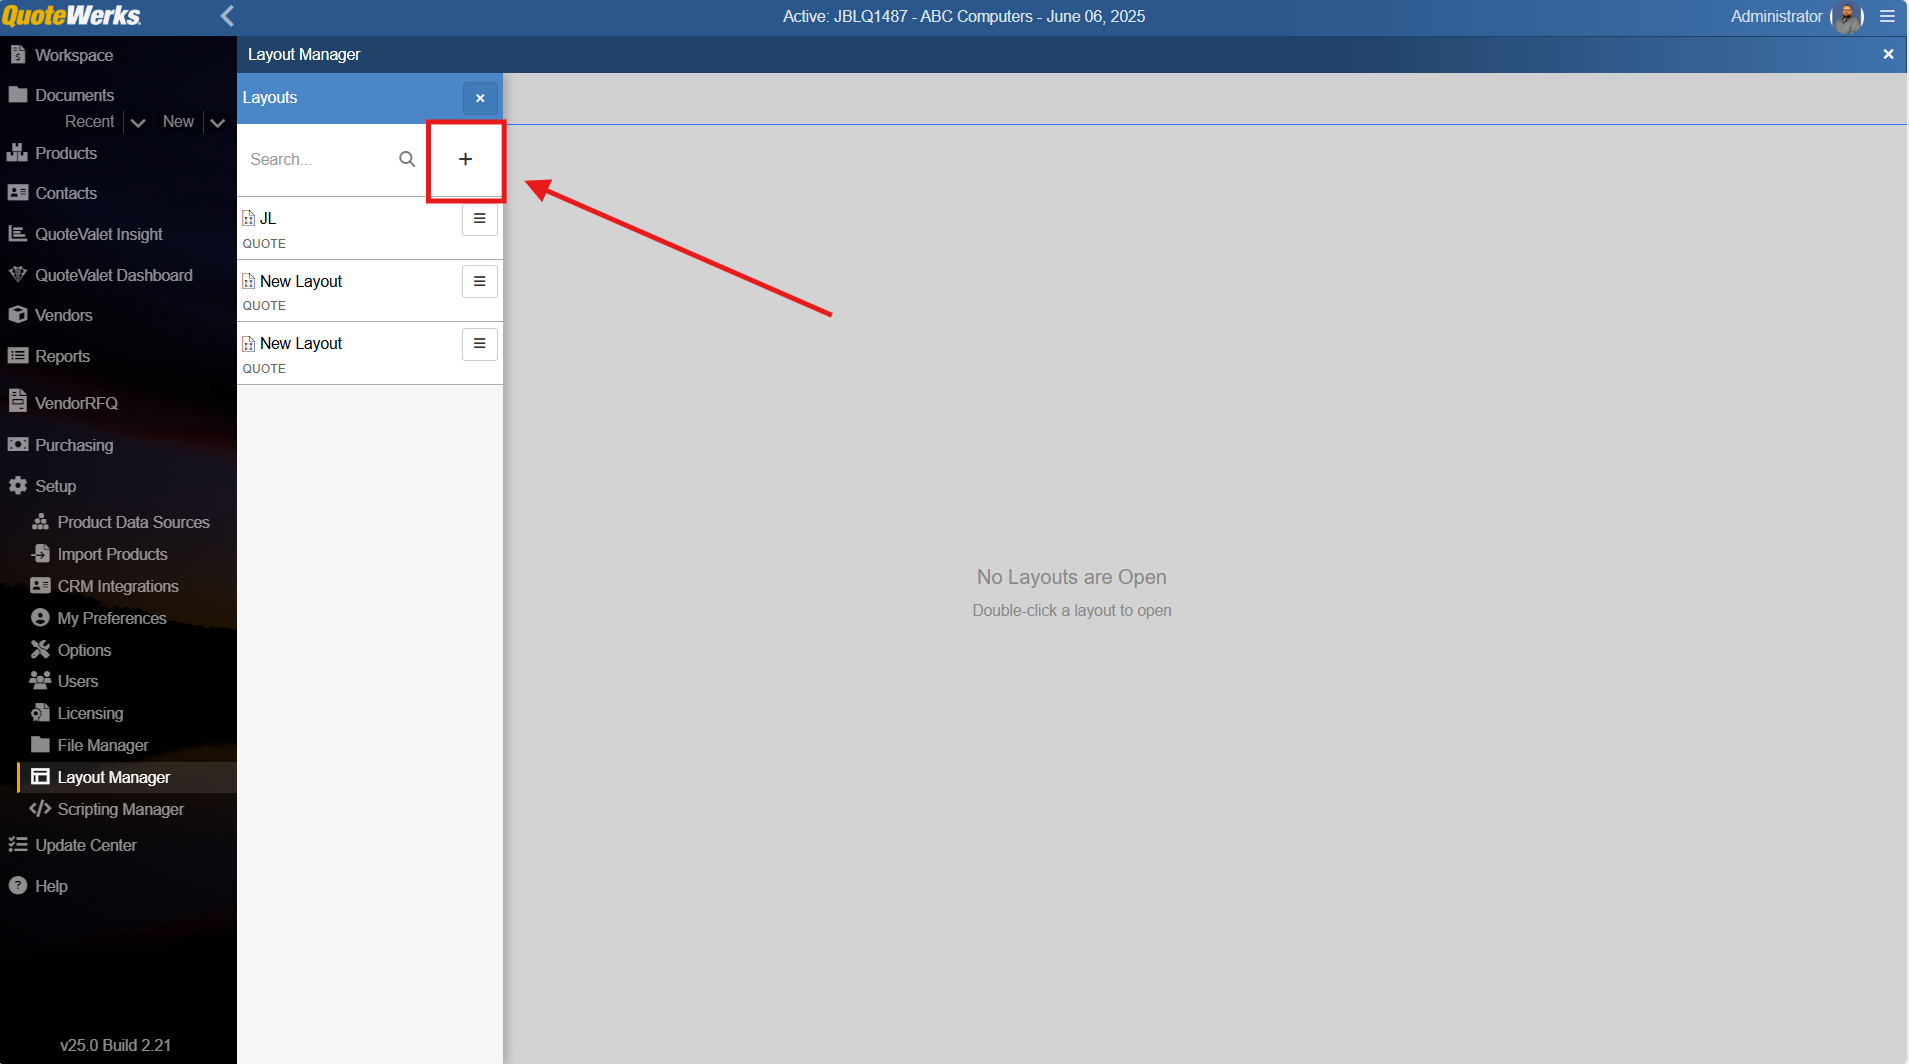
1. To begin, create a new layout by navigating to the Layout Manager and clicking the  (plus button).
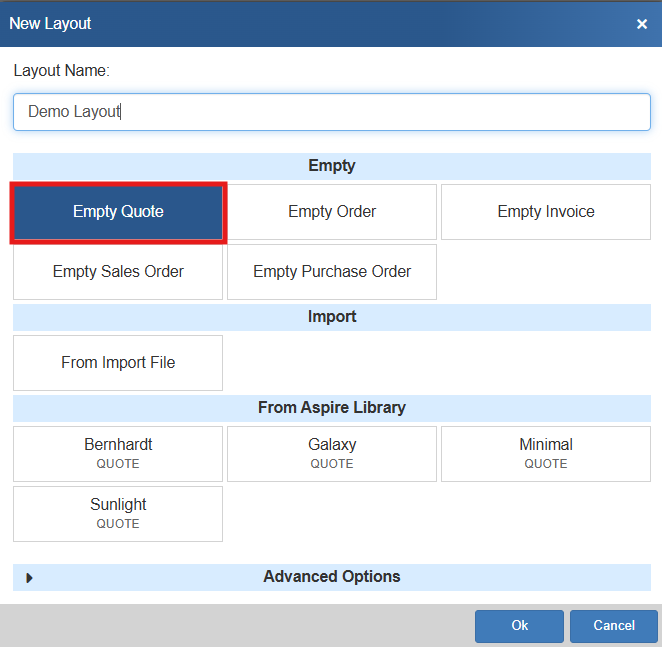
2. Give your layout a name and select the type of Layout you would like to create. For this demonstration we will select "Empty Quote" to start with a new quote layout. You could easily select to create an empty Order, Invoice, Sales Order, or Purchase Order instead. Additionally, you can import in .FPW files or begin using an existing template from the Aspire Library. Once you have made your selections, click OK.
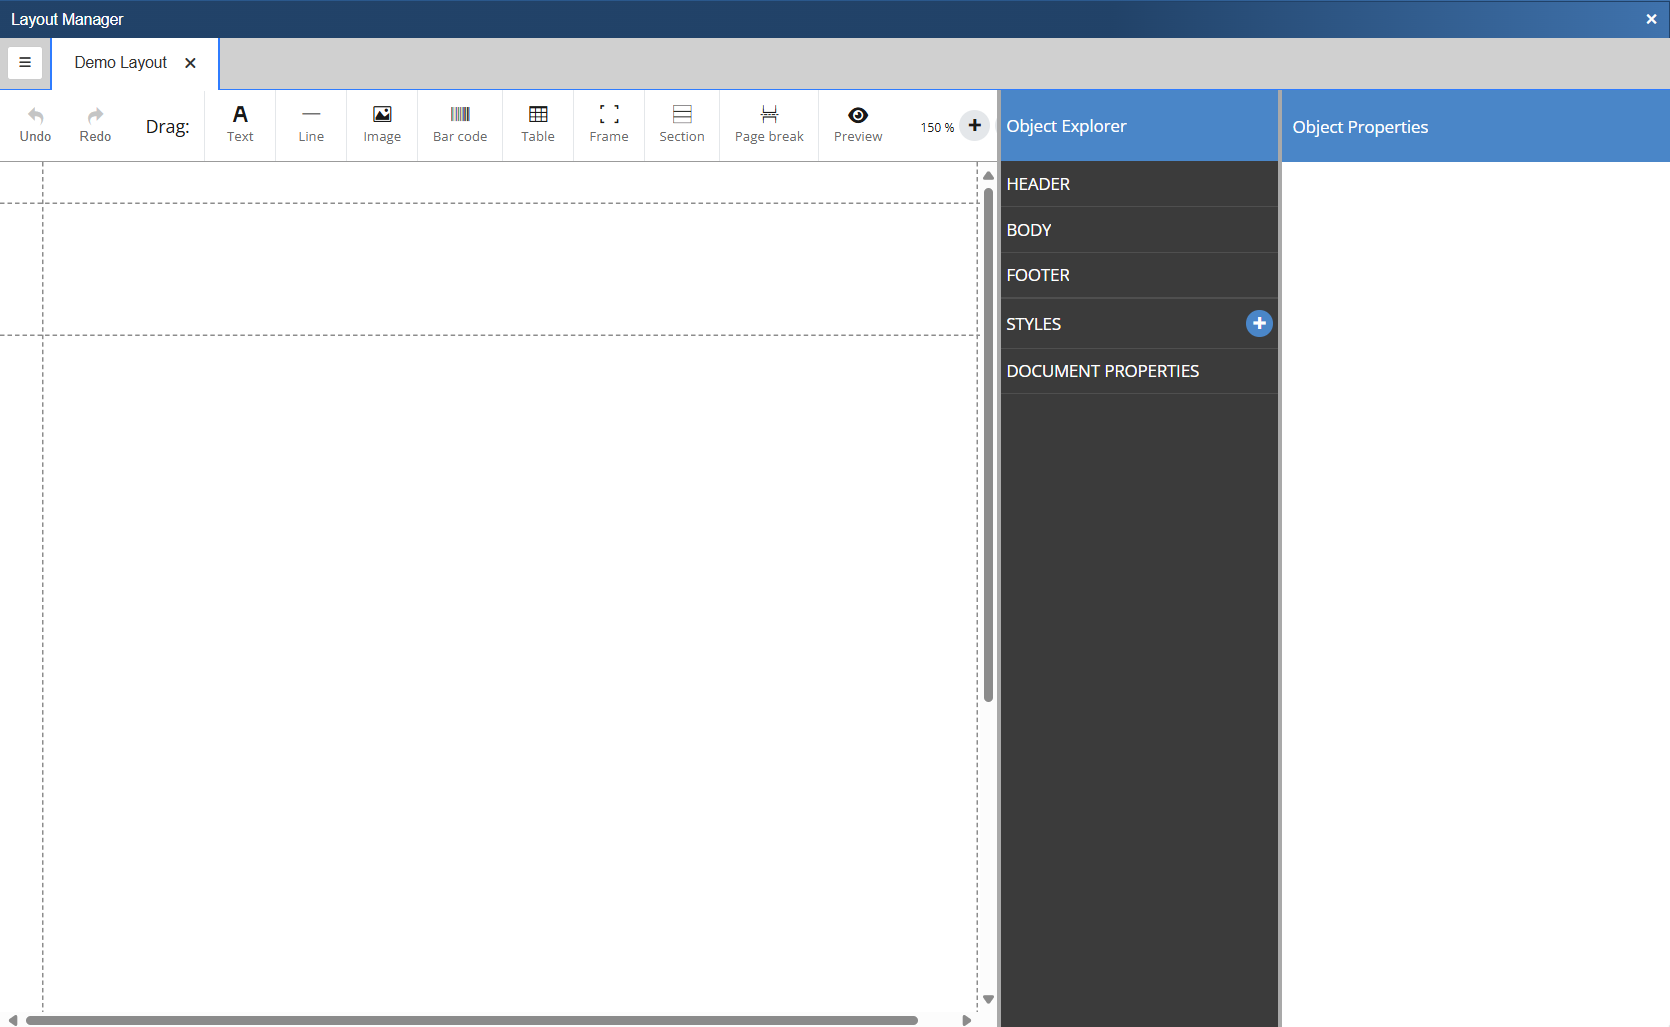
3. The new, unpopulated layout will open in the Layout Manager Editor.
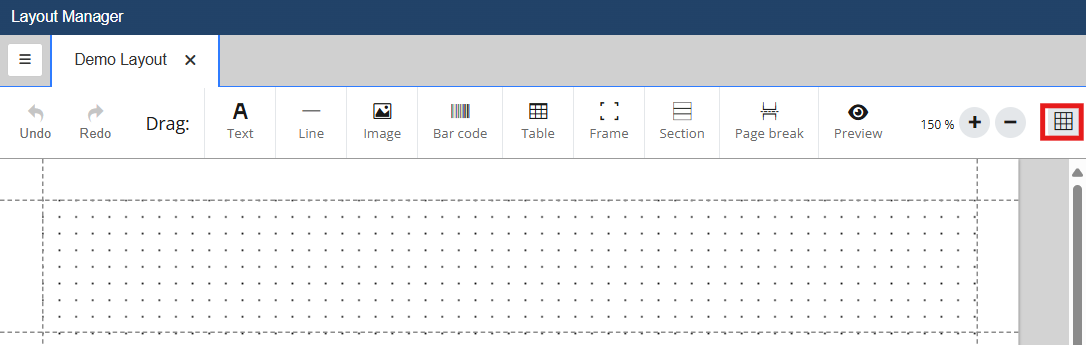
4. The editor has a grid available and it is a useful tool when designing layouts. To turn the grid on, click on the  button.
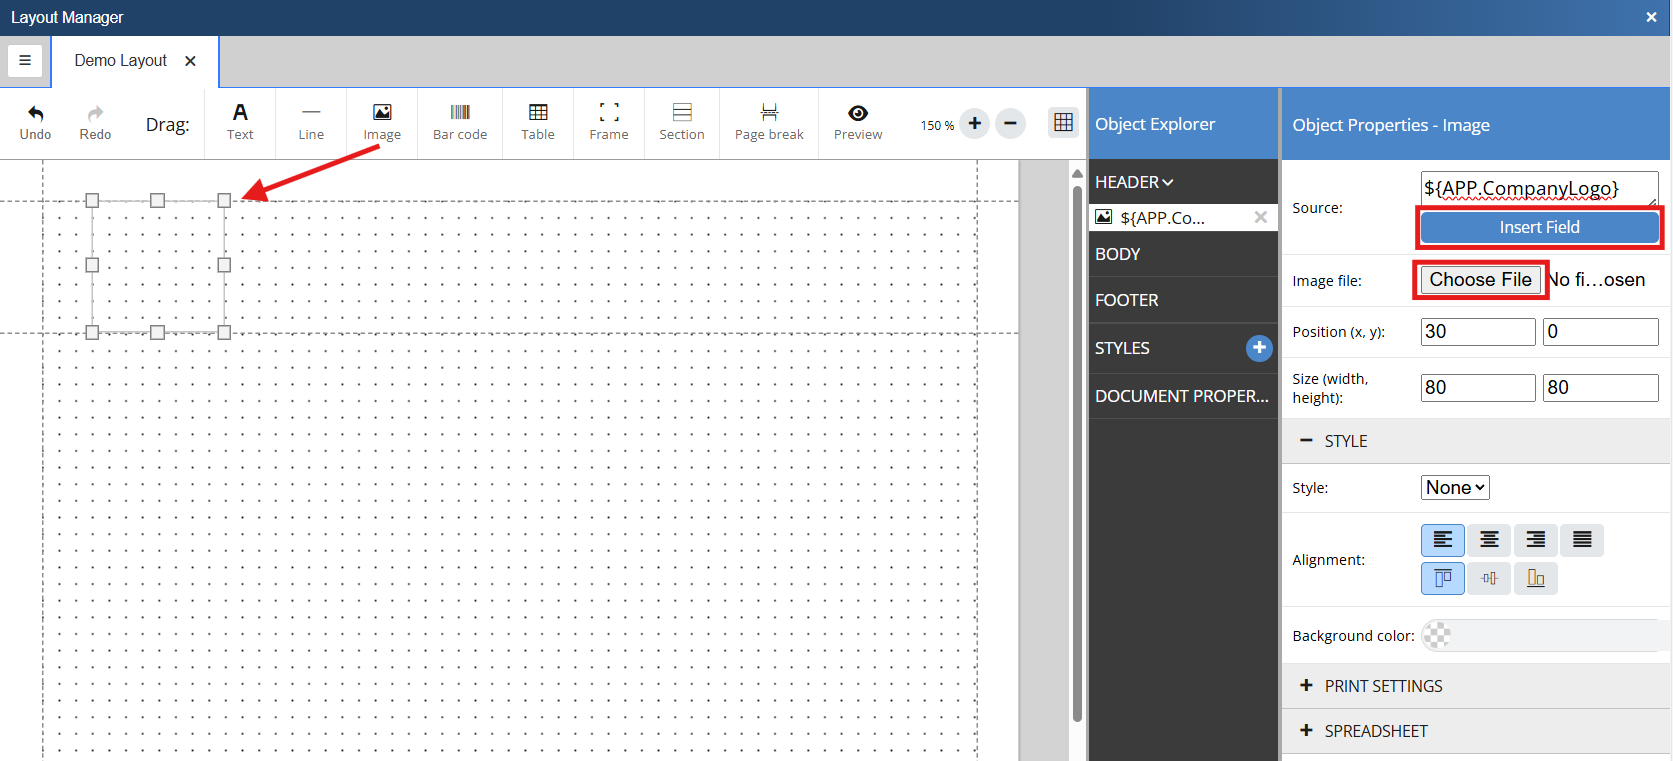
5. It is a good first step to ensure your logo is included at the top of your quote. To ensure that your logo prints at the top of every page it needs to be placed in the header. You can either load a picture or pull the image from an existing field in the QuoteWerks system. To add an image click on the image button and drag it onto the grid in the header section.
•If you want to load the picture from the system click on Insert Field and search for CompanyLogo. Select ${APP.CompanyLogo}. This will pull the logo you loaded to the Options -> Company page and use it on the layout.
•If you want the picture to be static and loaded from a file click on the Choose File button, navigate to the picture you would like to load and click Open.
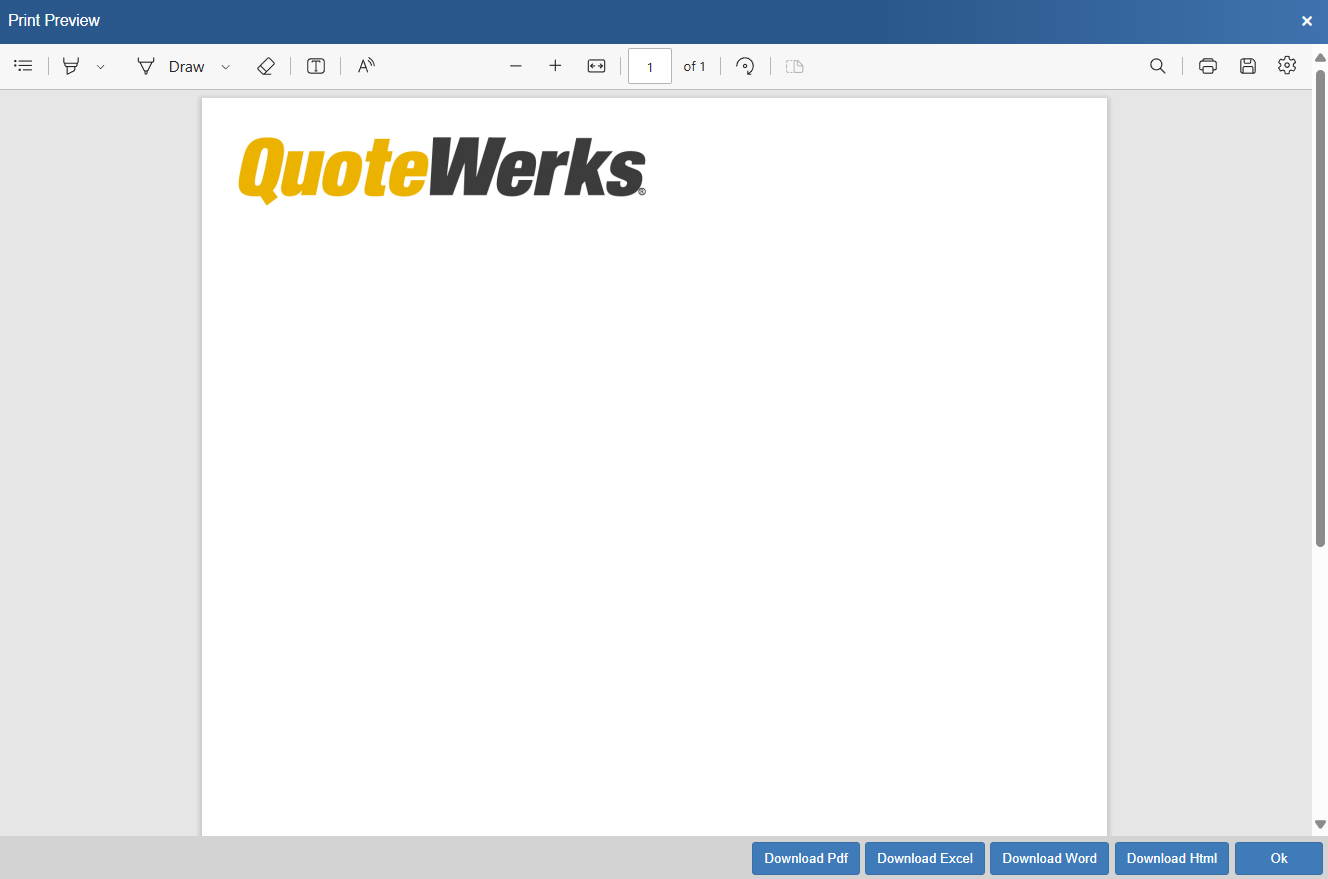
6. Regardless of which option you choose, the image will be displayed when you preview or print the layout, as seen below.
One of the building blocks of a layout are the text labels used to identify different fields that will be pulled from the QuoteWerks system. Text fields can be added to the layout by clicking on and dragging the  Text icon onto the grid.
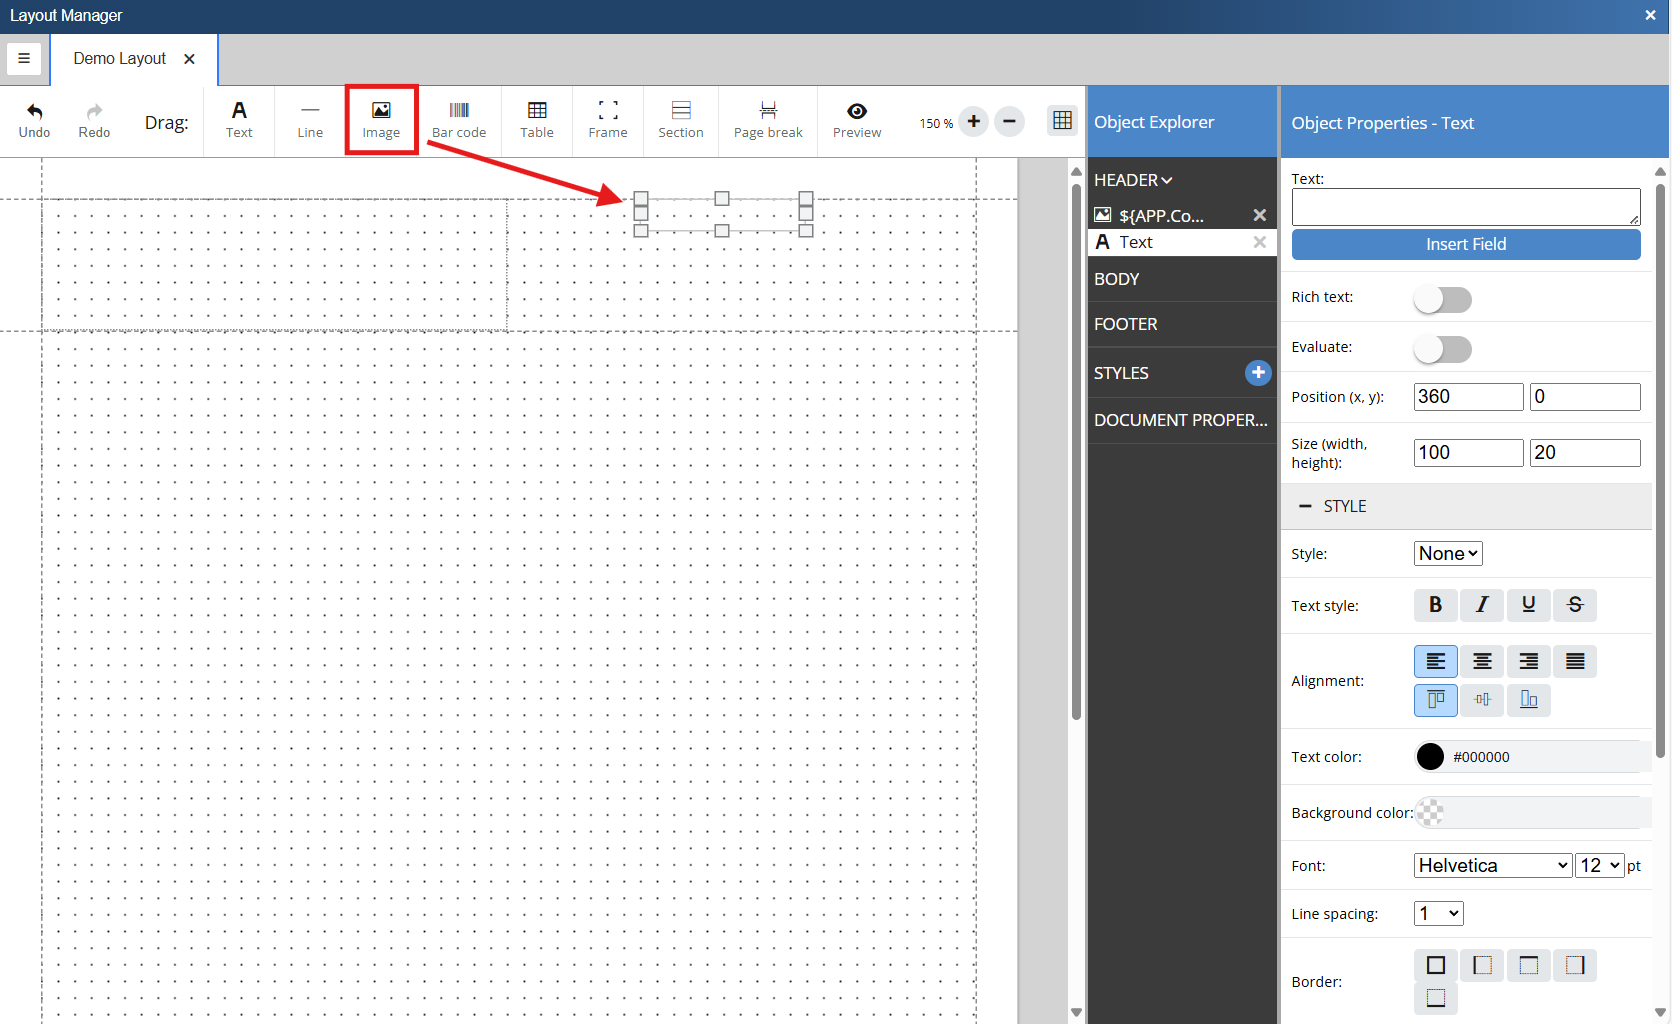
To add text into your text field simply type the text you would like in the Text field on the Object Properties side panel. This text will display in the text box on the grid.
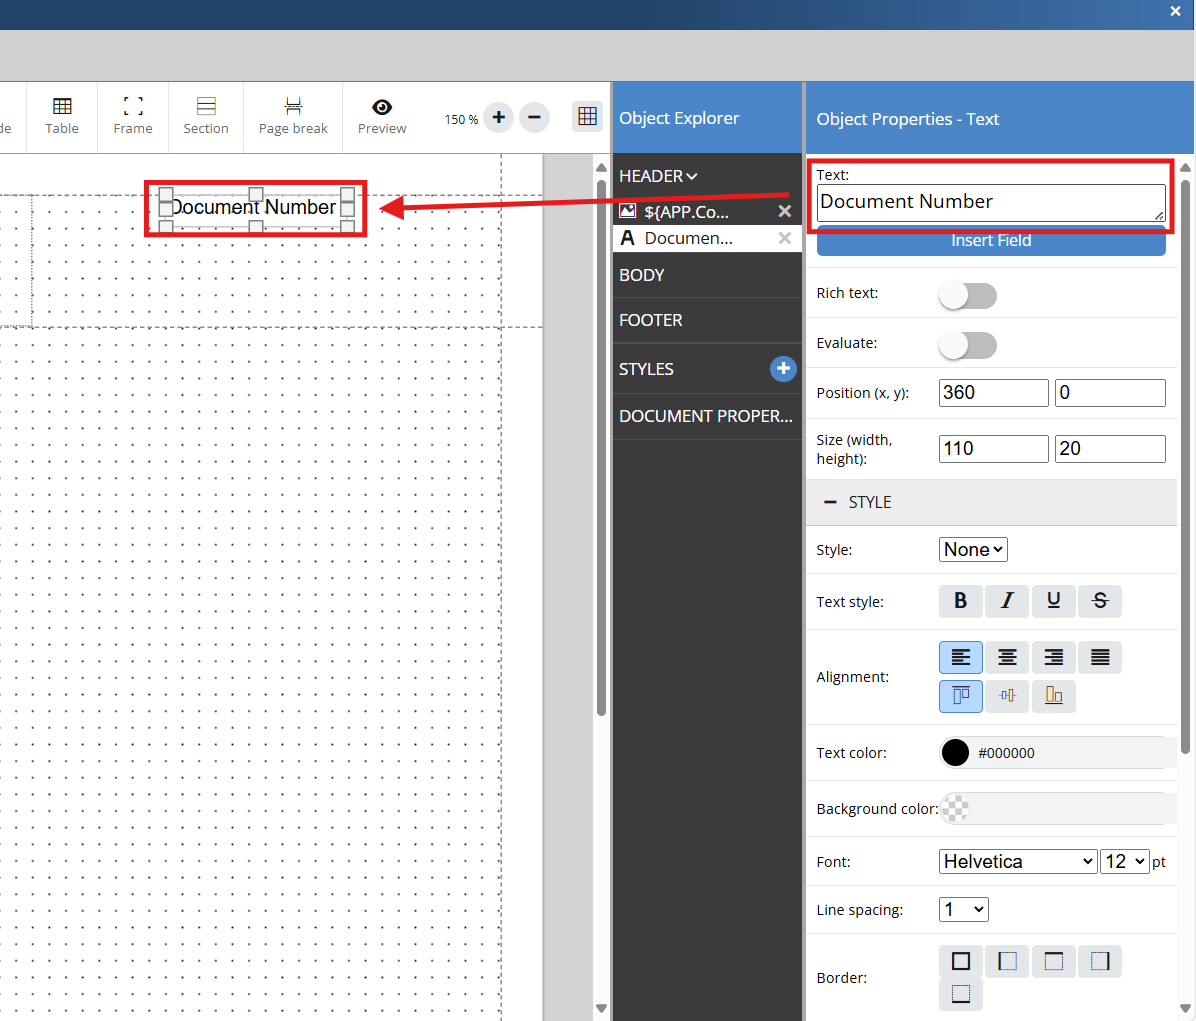
As seen above, you can format the text in whatever way makes the most sense to you. You can assign a saved style, set the text style, alignment, text and background color, font, spacing, border, and more.
If we preview the document you can see that the logo is included along with the static text we just entered:

One of the most powerful parts of QuoteWerks layouts is the ability to pull information from tables and fields stored in the QuoteWerks Database. These can be used to pull in customer information, product information, application information, and more. Data Fields are inserted in the layout using the Text object.
1. Drag a text object onto the document and place it where you would like it to be positioned.
2. Click on the field and the objects Object Properties will open.
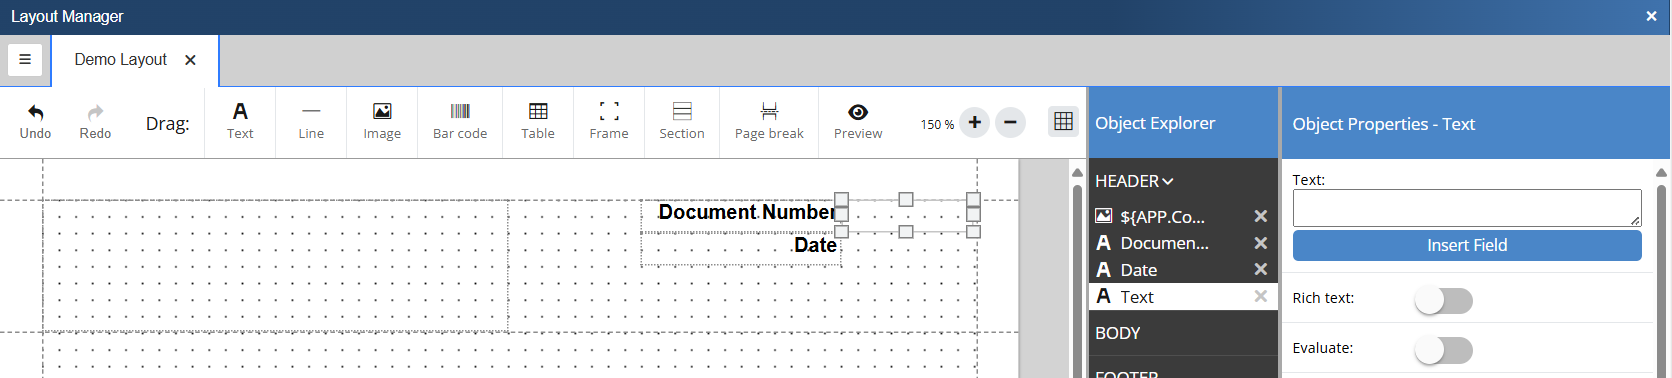
3. Click on Insert Field and locate the field you would like to use. For a full list of tables and fields please see Tables and Fields. For this example we want the Document Number so we will locate and select DH.DocNo. There is a search field at the top of the field selection window that can be used to easily find the field you would like to use.

4. When you select the field you would like to include on the document, the field on the grid will update to show the macro for the filed you are inserting as seen below.

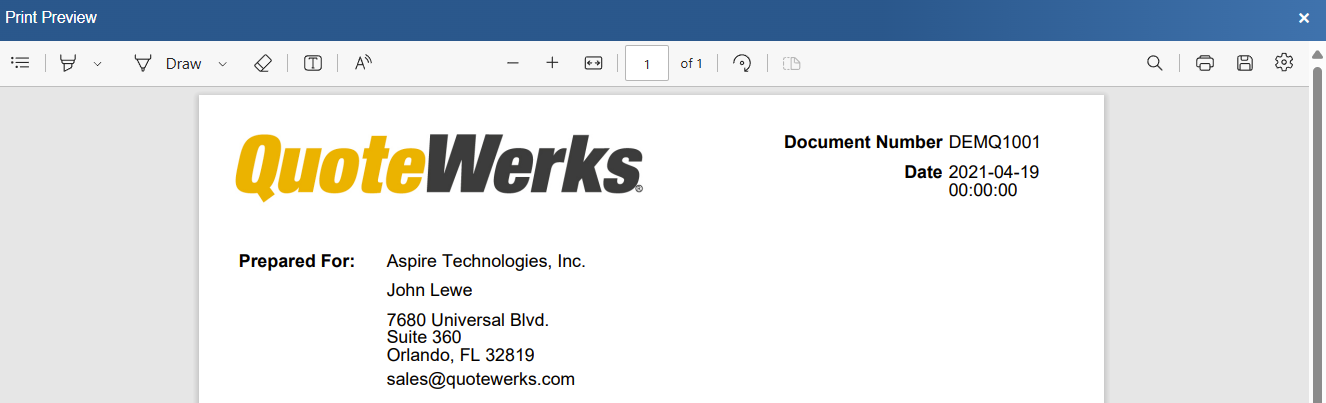
5. When you preview the layout, you can see that the macro ${DH.DocNo} has been replaced with the document number from the currently open document.

From here you can populate the document with whatever labels and fields make the most sense for your business.
Frames are a great way to organize your document and ensure similar fields are grouped together. This is particularly useful for formatting purposes and ensuring that dynamic text is handled appropriately.
1. To insert a frame click on the  Frame Icon and drag it onto the grid. Re-position and re-size the frame as needed.

2. Name the Frame by entering text into the label field. This will change the name on the Object Explorer.

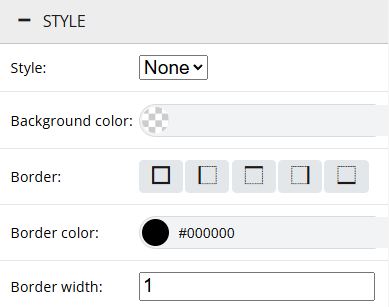
3. You can then style the frame using the Style options.
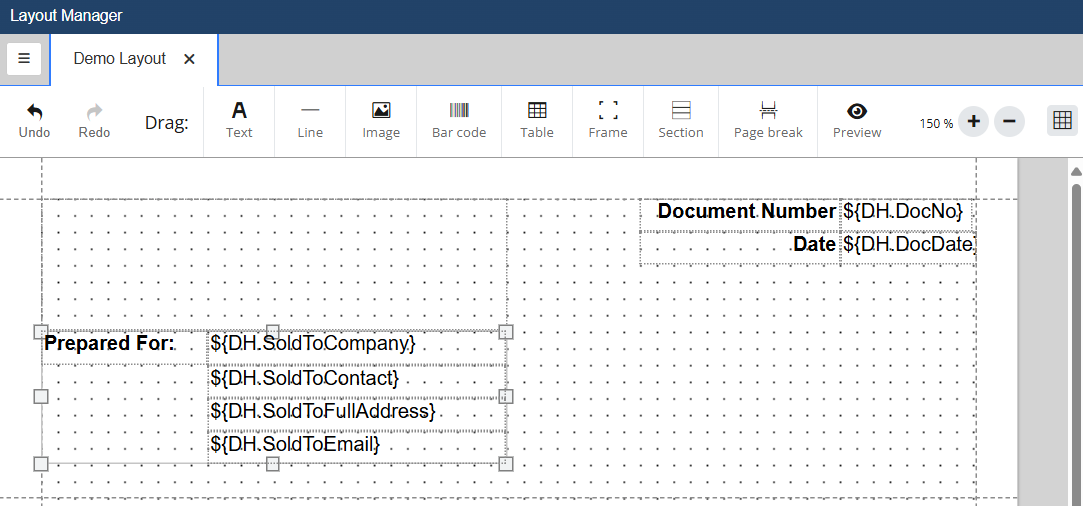
4. Next, you will want to populate the frame with labels and data fields. For this demonstration we are adding in the sold to information as seen below.
When printed, the layout will look like this:
5. Frames can be moved as a group and can be copied and pasted within the same layout or to another layout.
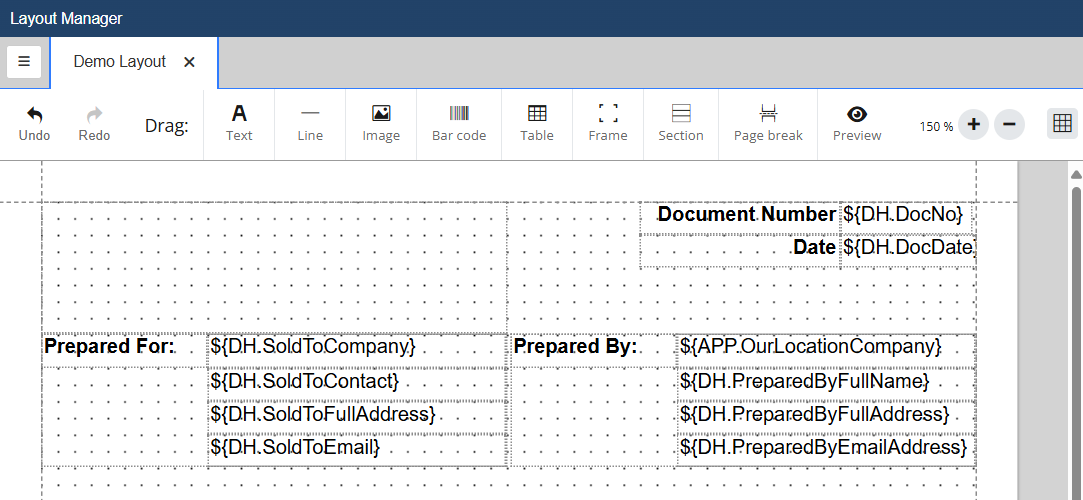
6. As seen below, we have added a second frame for our prepared by information. This was done by copying the Sold To frame and changing the label and data fields.
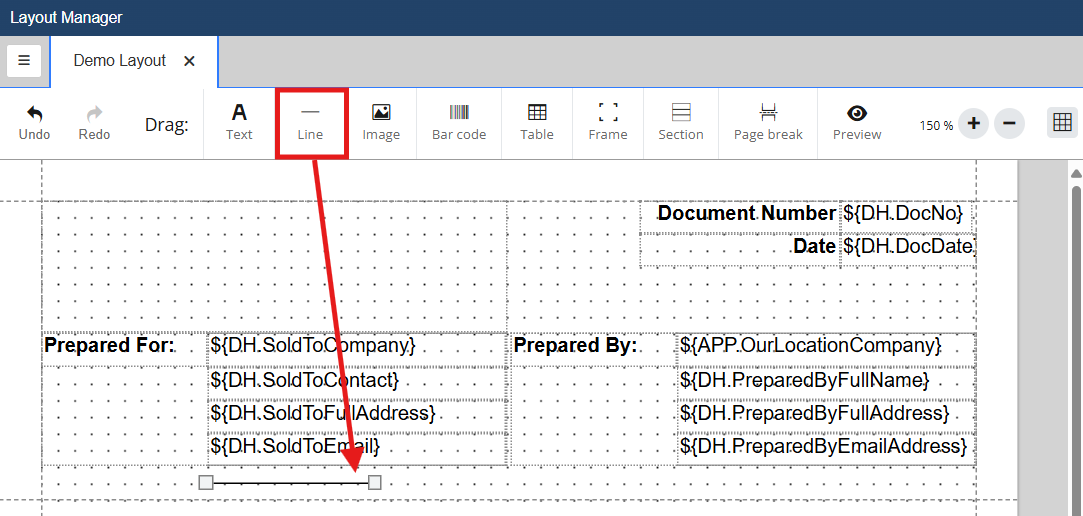
Horizontal Lines can be added to a layout to break up different sections. Inserting a horizontal line is done by clicking on the  Line button and dragging it into the grid. Once in the grid you can drag the line wherever you would like and adjust its size using the selectors on each side of the line.
The easiest way to display item data on a layout is by using a table. The items table is placed into the body of the layout.
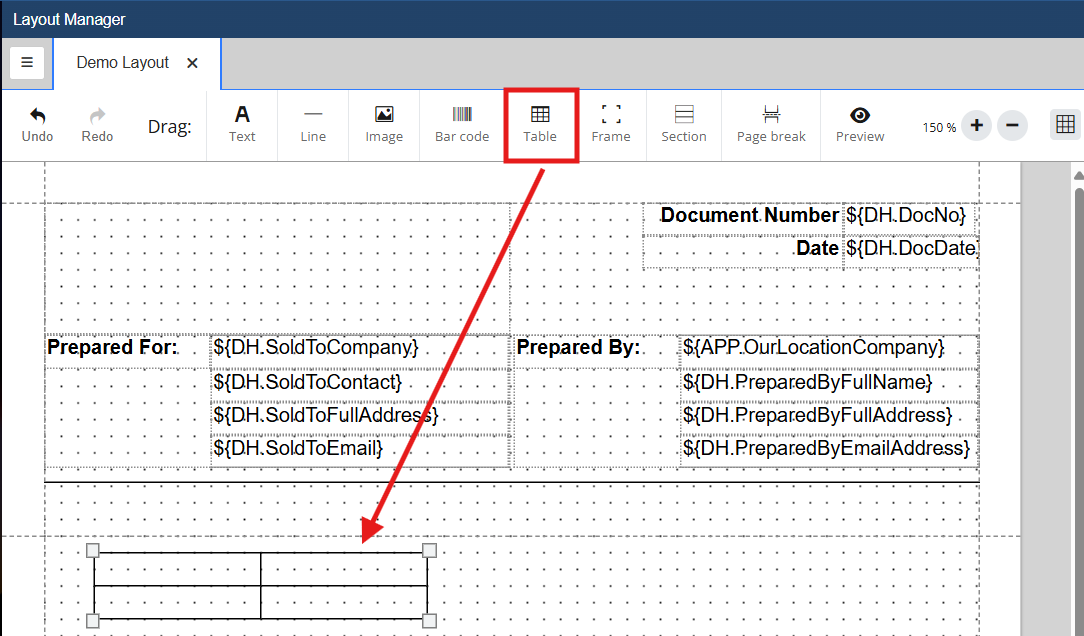
1. Select the  Table icon and drag it onto the grid in the body section.
2. Adding the table to the document will open the object properties for the table.
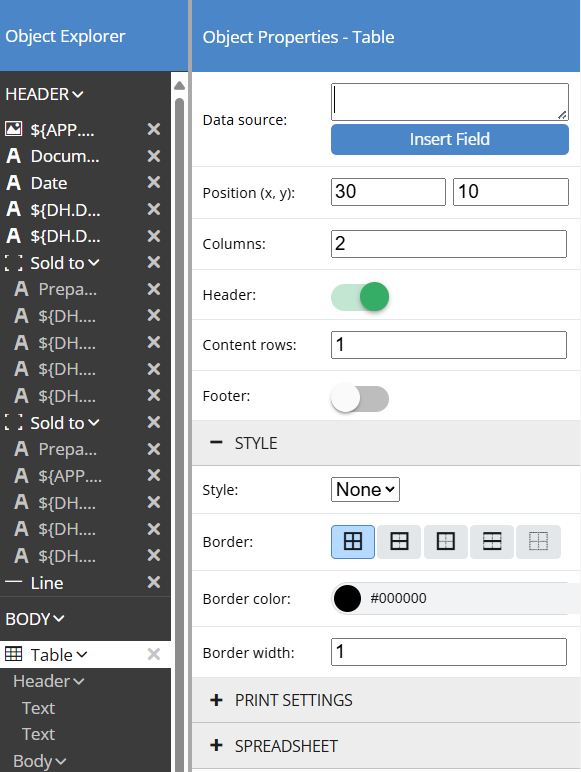
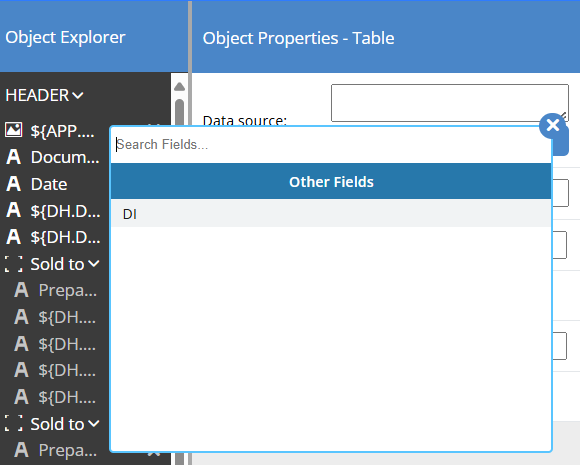
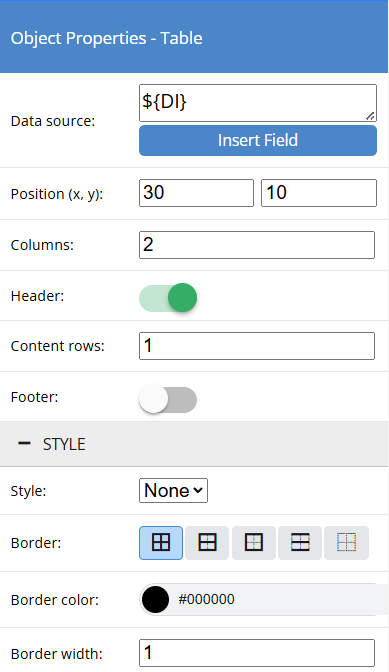
3. Select your Data Source by clicking on the Insert Field button next to Data Source. This will default to DI or the Document Items table.
4. Set your table settings and style from the Object Properties side panel.
Position
This determines the position of the table on the grid. This can also be adjusted by dragging the table to the desired position.
Columns
This allows you to set the number of columns you would like your table to have.
Header
This toggle allows you to include or exclude a header row as the first row in the table.
Content Rows
This allows you to set the number of rows you would like your table to have, excluding header and footer rows.
Footer
This toggle allows you to include or exclude a footer row as the last row in the table.
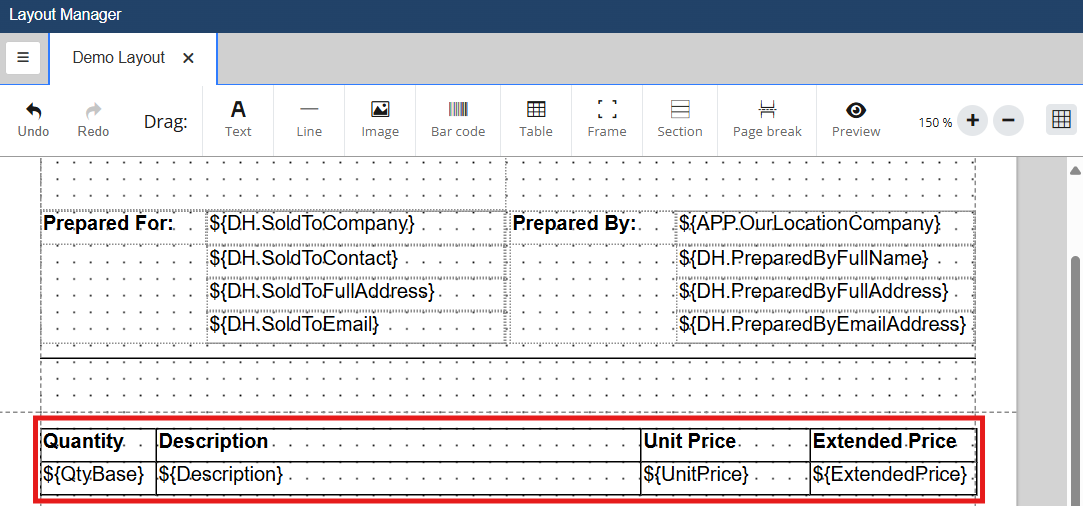
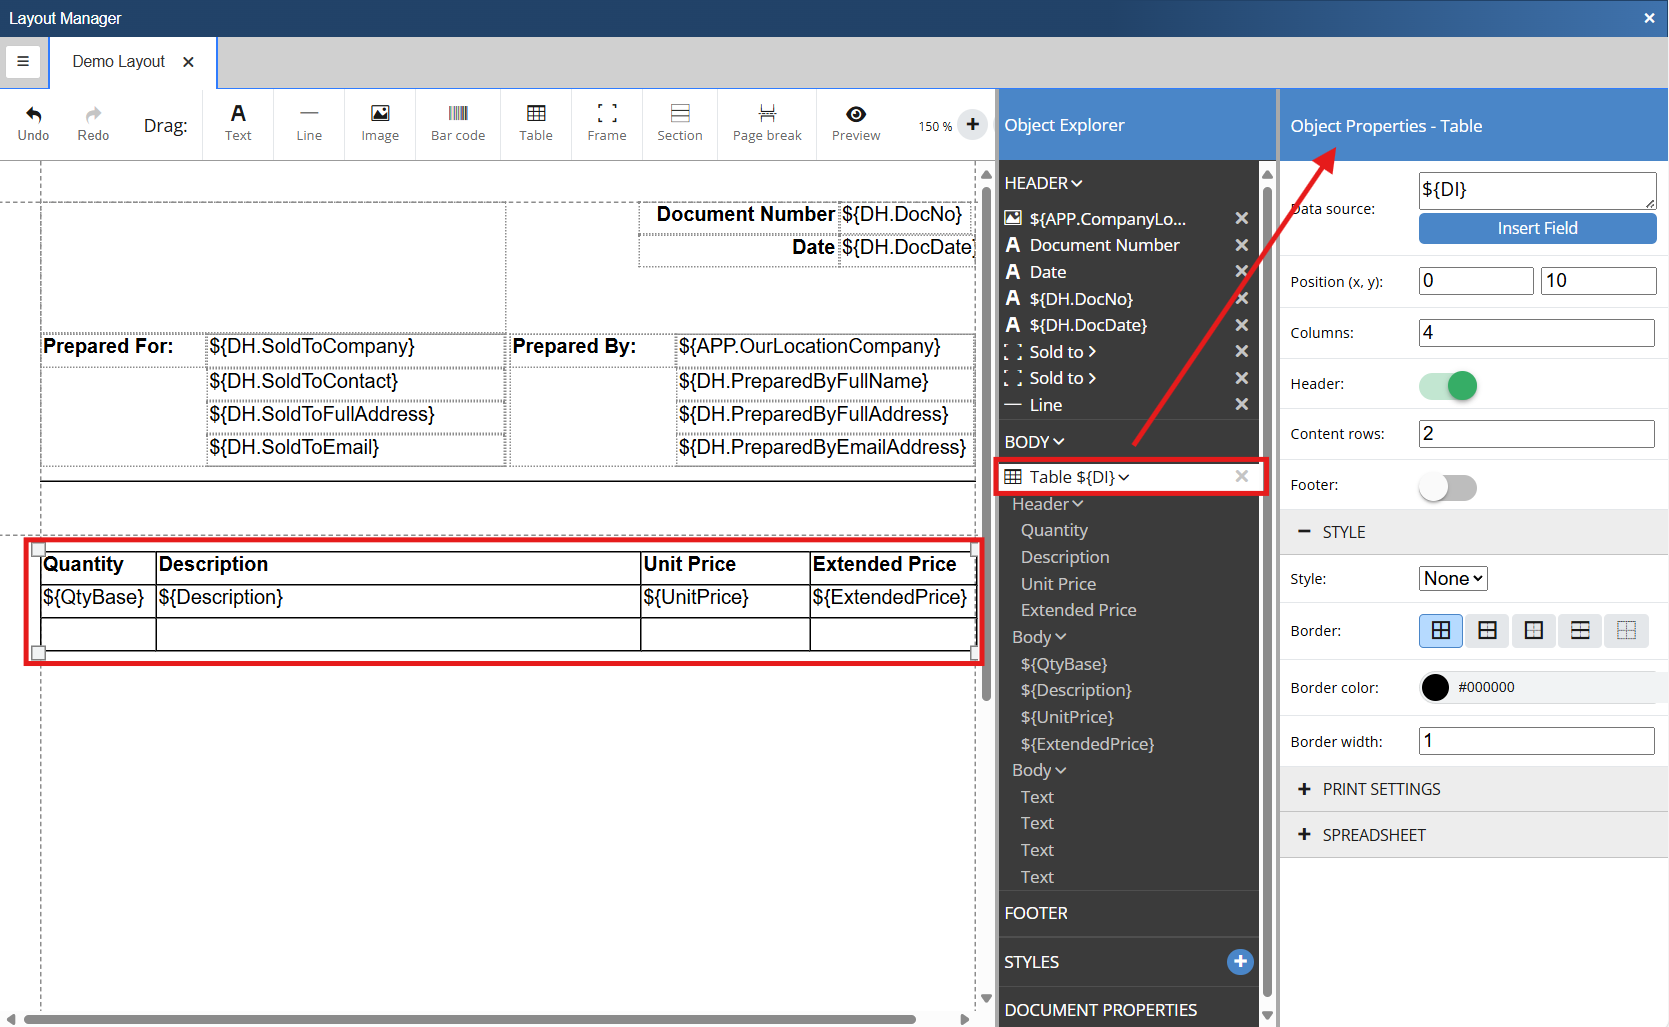
5. A typical layout will include 4 columns: Quantity, Description, Unit Price, and Extended Price. As such, we have set the number of column to 4, re-sized, and re-positioned the table to where we would like it to be located. Additionally, we have added the column labels and the corresponding Data Fields to the second row as seen below.
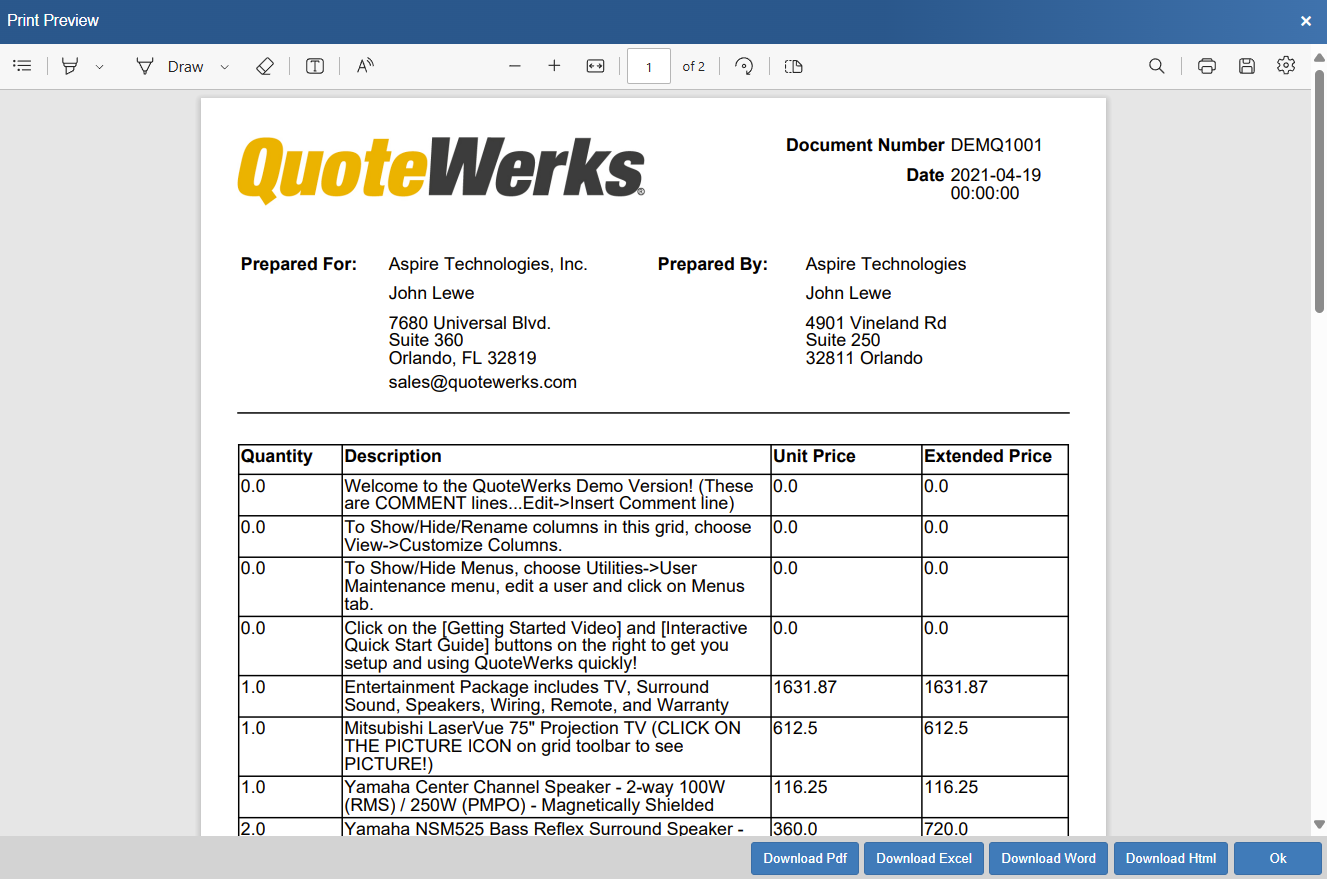
All lines from the document will print in the content rows, as seen below.
6. We want to ensure that each of the line types prints different. For example, we want headings to display differently than product and service line items, comments, subtotals lines, etc. We can do this with the use of additional content rows and using Print if.
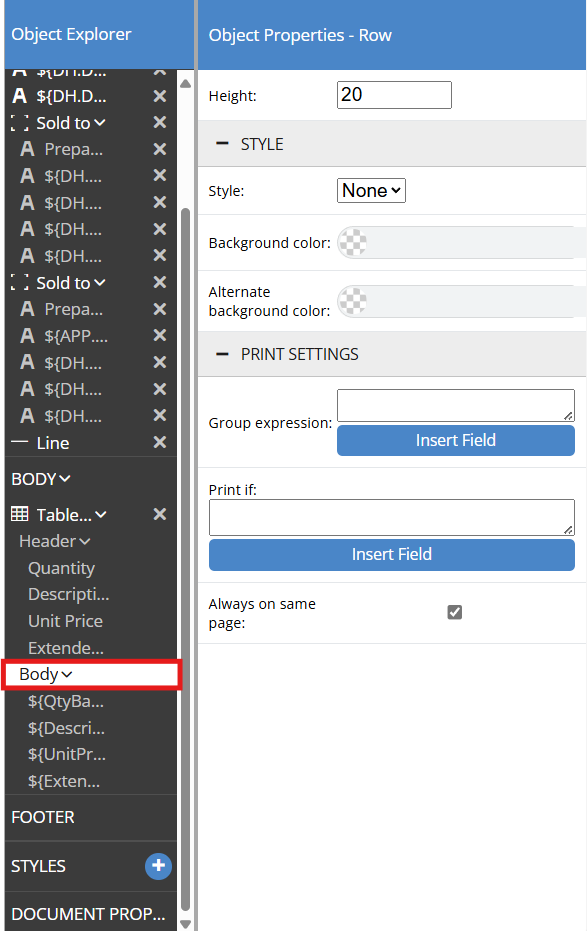
6a. To begin we will make it so that our products and services print with the existing formatting. To do so select the body of the table that we would like to format from Object Explorer.
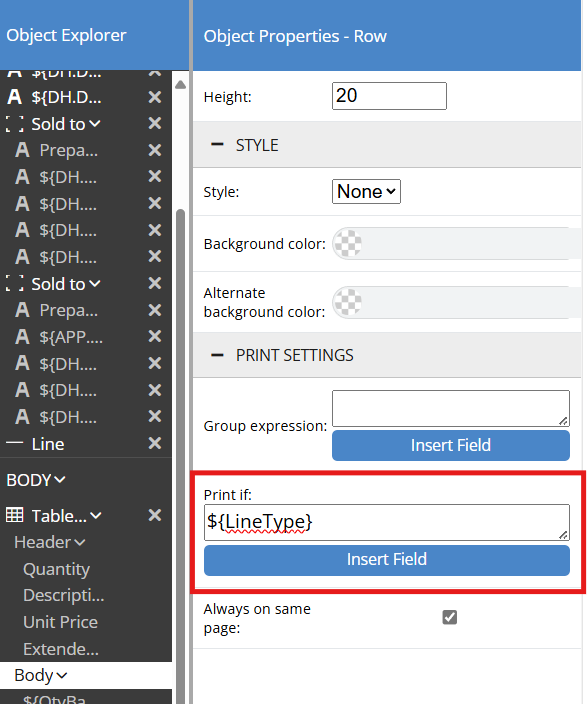
6b. Next, we want to build an expression in the Print if field that only prints Line Types equal to Product and Services. Click on Insert Field and locate LineType. Click on LineType to add it to the Print if field.
6c. Because we only want line types equal to products and services we will insert a == after ${LineType] and click insert field to find the constant that represents this line type.
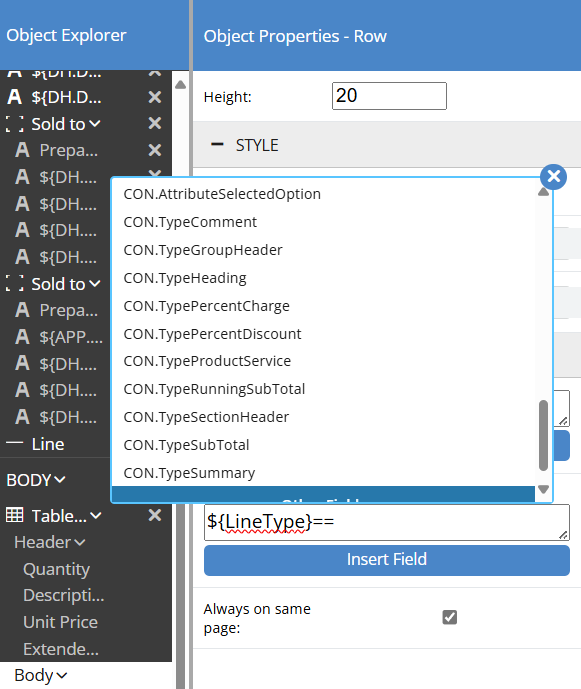
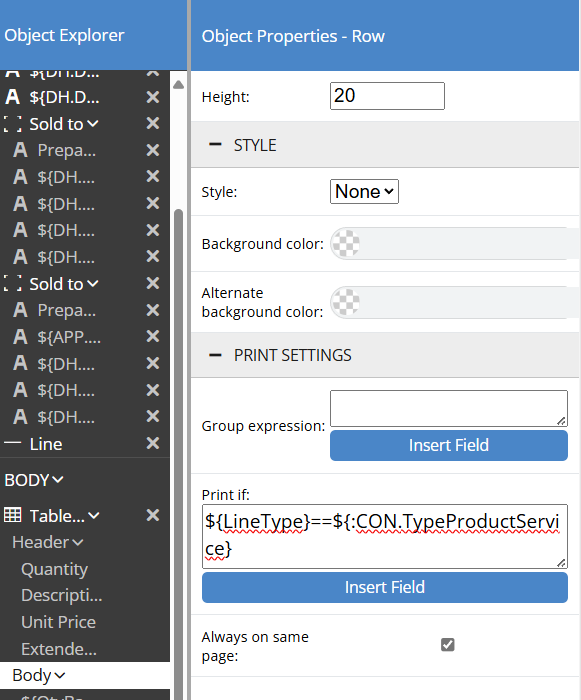
6d. The resulting expression will look like ${LineType}==${:CON.TypeProductService} Now, the formatting of this row will only be used to print product and service line types.
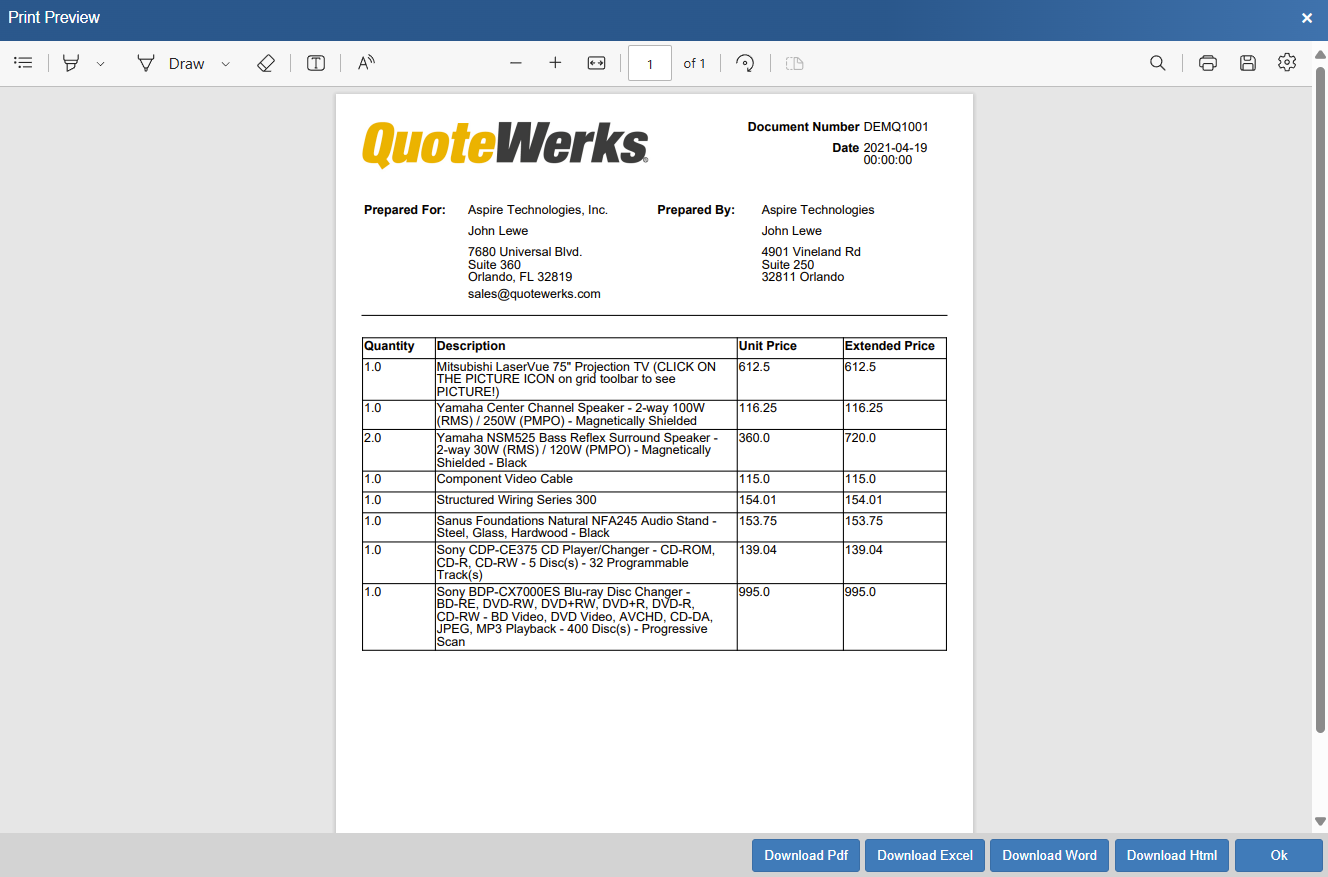
6e. As seen below, now only the product and services line items are printing. In subsequent steps we will show how to format and include other line types on the document.
Each line type or line attribute can be used to determine how and what prints on the layout using the Print if feature. Below we show how to create a row and filter so that heading lines print with a specific formatting.
|
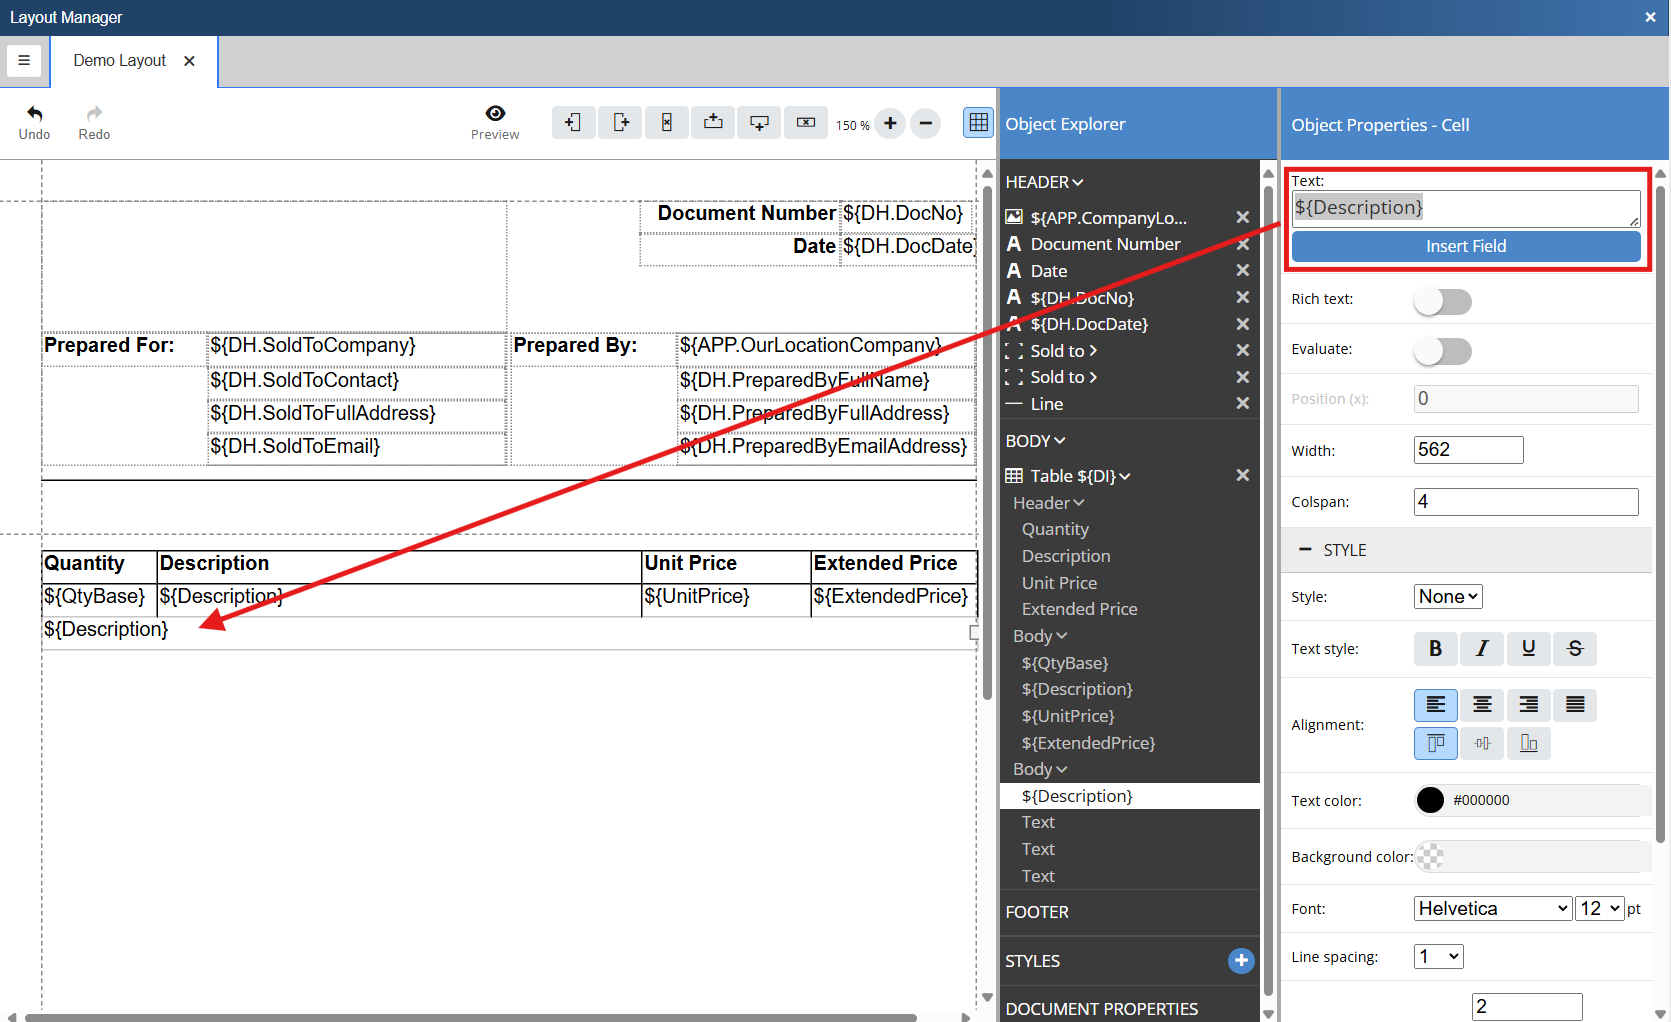
1. Begin by clicking on the table or its entry in the Object Explorer to open the table Object Properties. We want to add a row and to do so we have changed the Content Row value to 2 from 1. This adds a second row to our table.
2. We want our heading lines to print only the description so we need to adjust our table to allow this line to span all columns. Double click into the second row and the Object Properties - Cell selection panel will open for this object. Set the Colspan value to 4, which will make the second line one large cell.
3. Double click on the second rows cell and this opens the Object Properties - Cell panel again. This time, click on Insert Field and select ${Description}. This will input that field into the cell.
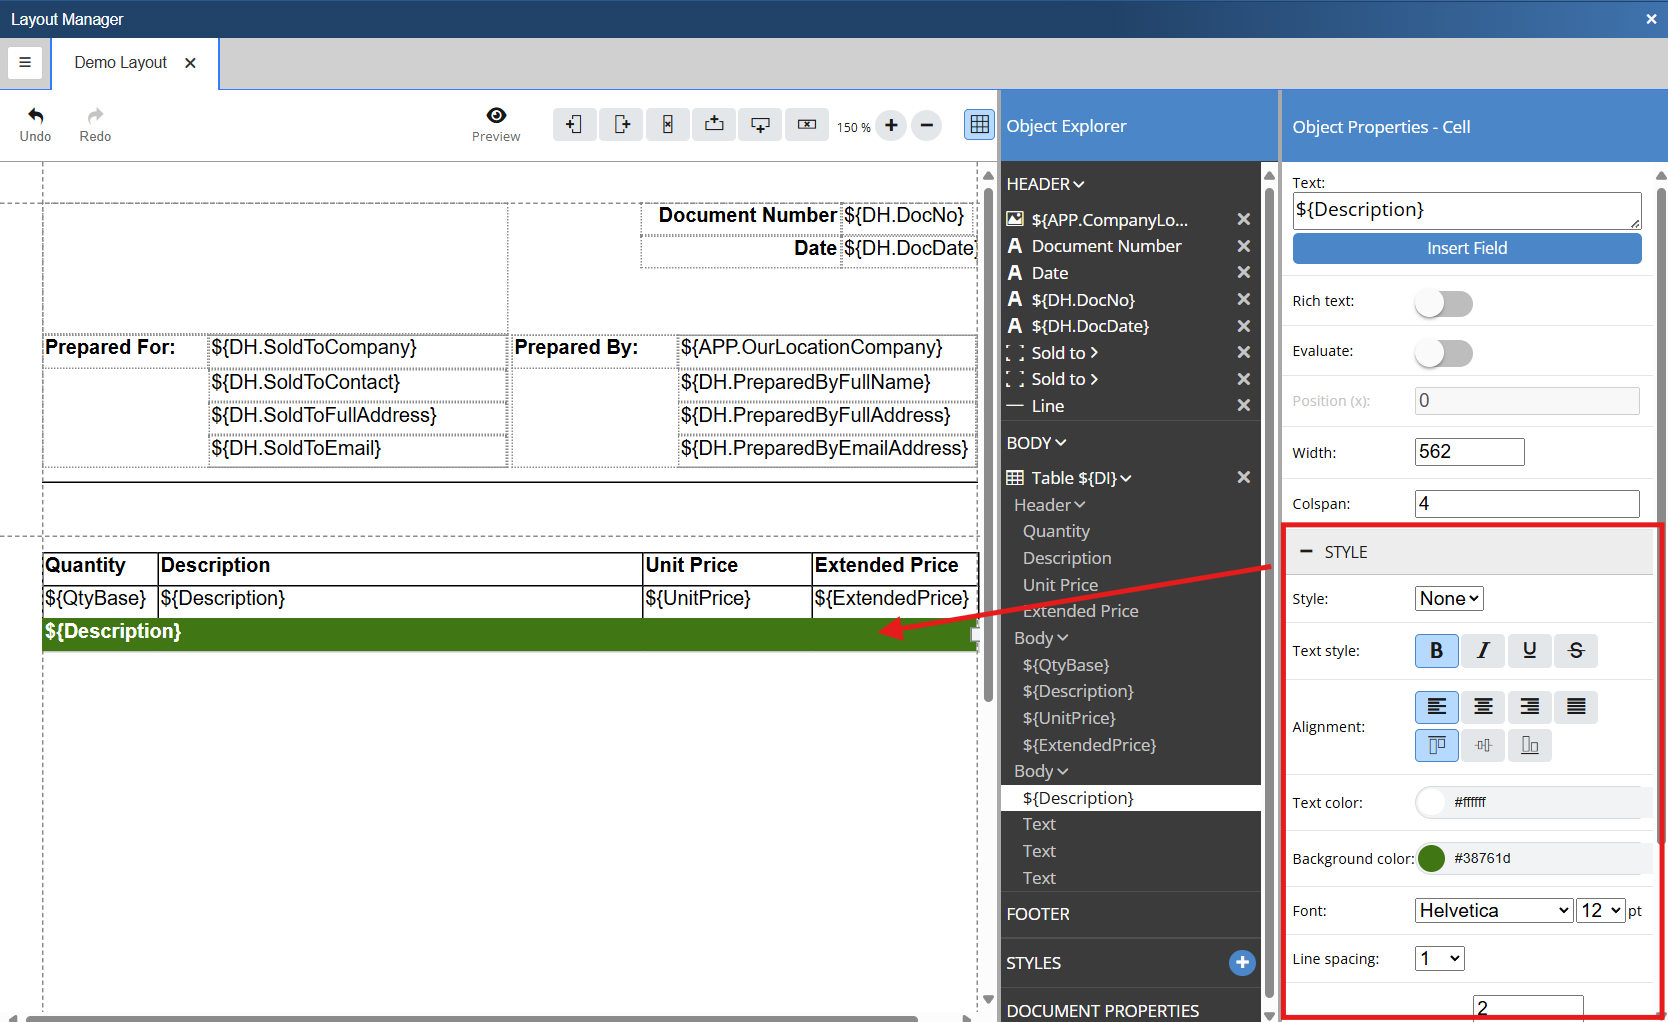
4. We want the heading lines to print with a bold font and with a different font and background color. To do this we will click on the cell and use the style options in the style section of the right selection panel.
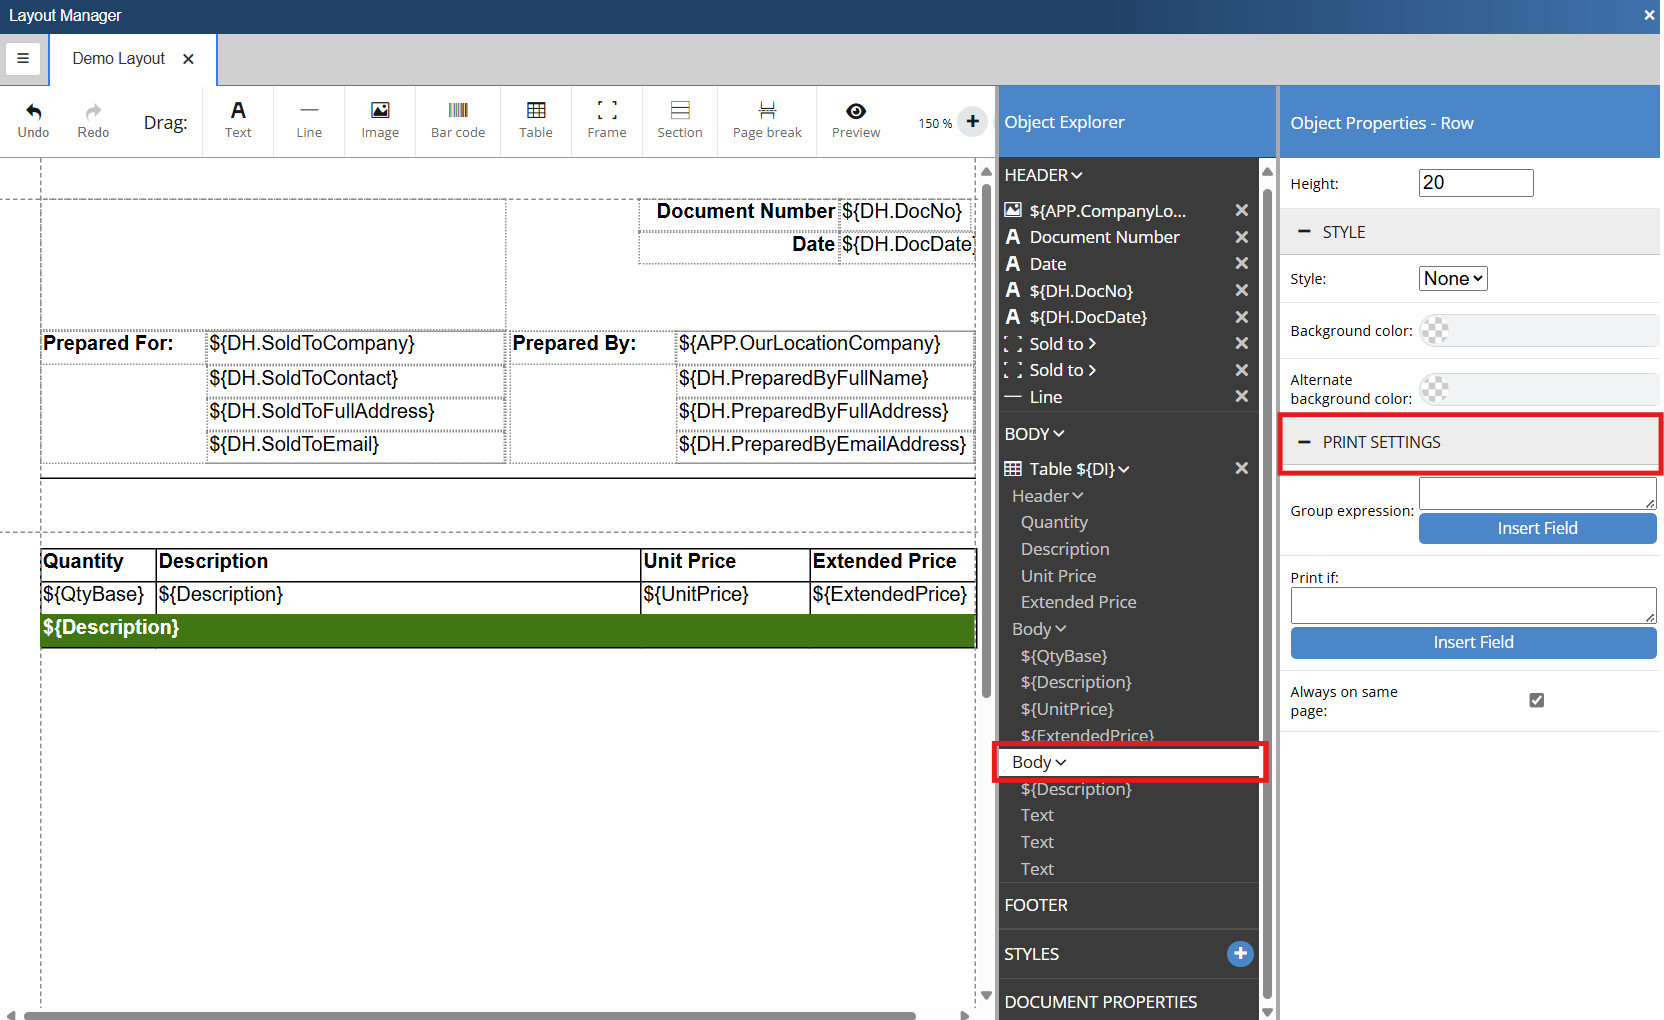
5. Now that we have our formatting set we need to create a Print if expression that will only print this line if there is a matching Line Type in the source document. To do so click on the Body object for the table row we just formatted in the Object Explorer. This will open the Object Properties - Row selection panel. Click on the plus button to expand the Print Setting section.
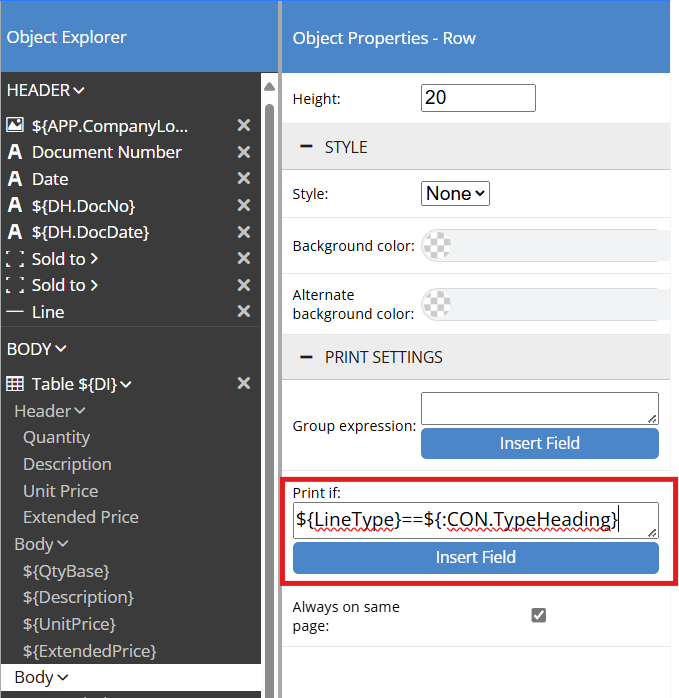
6. We now want to build our expression in the Print if field. To do so click on Insert Field. Search for line type and select it. This inputs ${LineType} into the Print if text box. Next type == as we want our line type to equal heading. If you click Insert Field one more time, search for "heading", and select it. This inputs the heading constant and the expression is now ${LineType}==${:CON.TypeHeading}. This means that only heading lines will print using the formatting in this row.
7. Now, when we preview the document, any heading lines will print using the new formatting.
Adding a Document Totals Section
The next step in building a layout is to add a document totals section including a subtotal, tax, and a grand total. This is easily done using text labels and data fields.
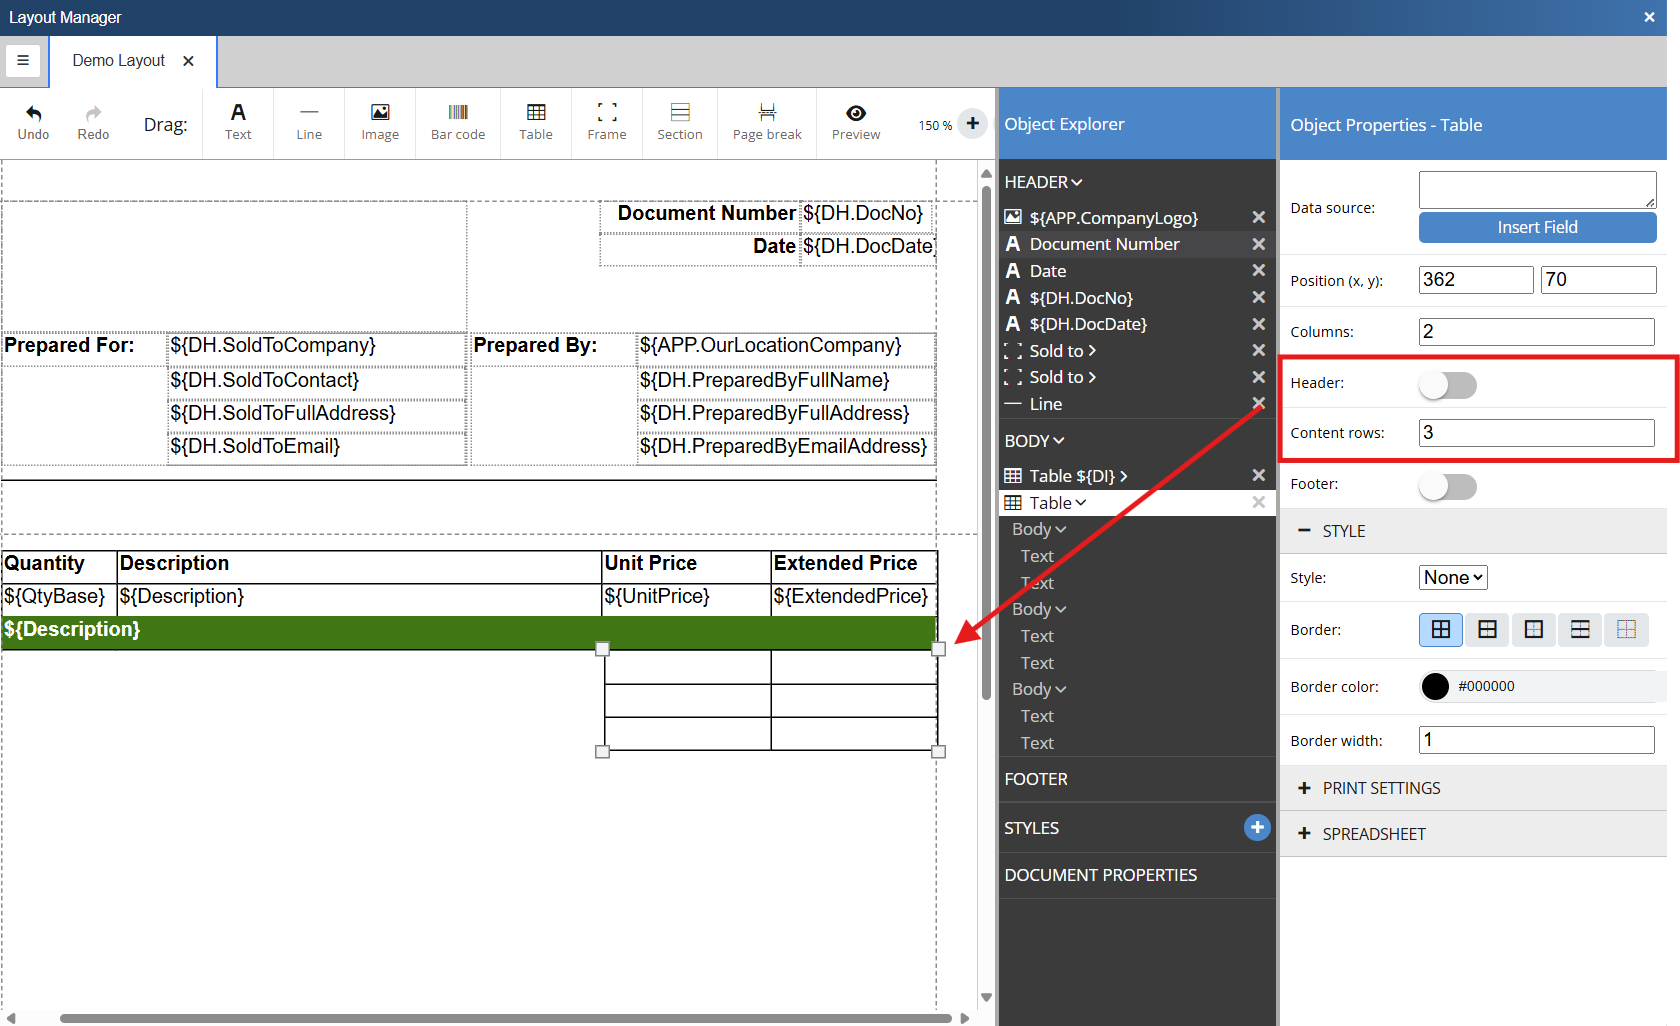
1. Insert a table into the layout by clicking on and dragging the Table icon onto the layout. In the Object Properties - Table selection panel deselect the header toggle and change the number of content rows to 3.
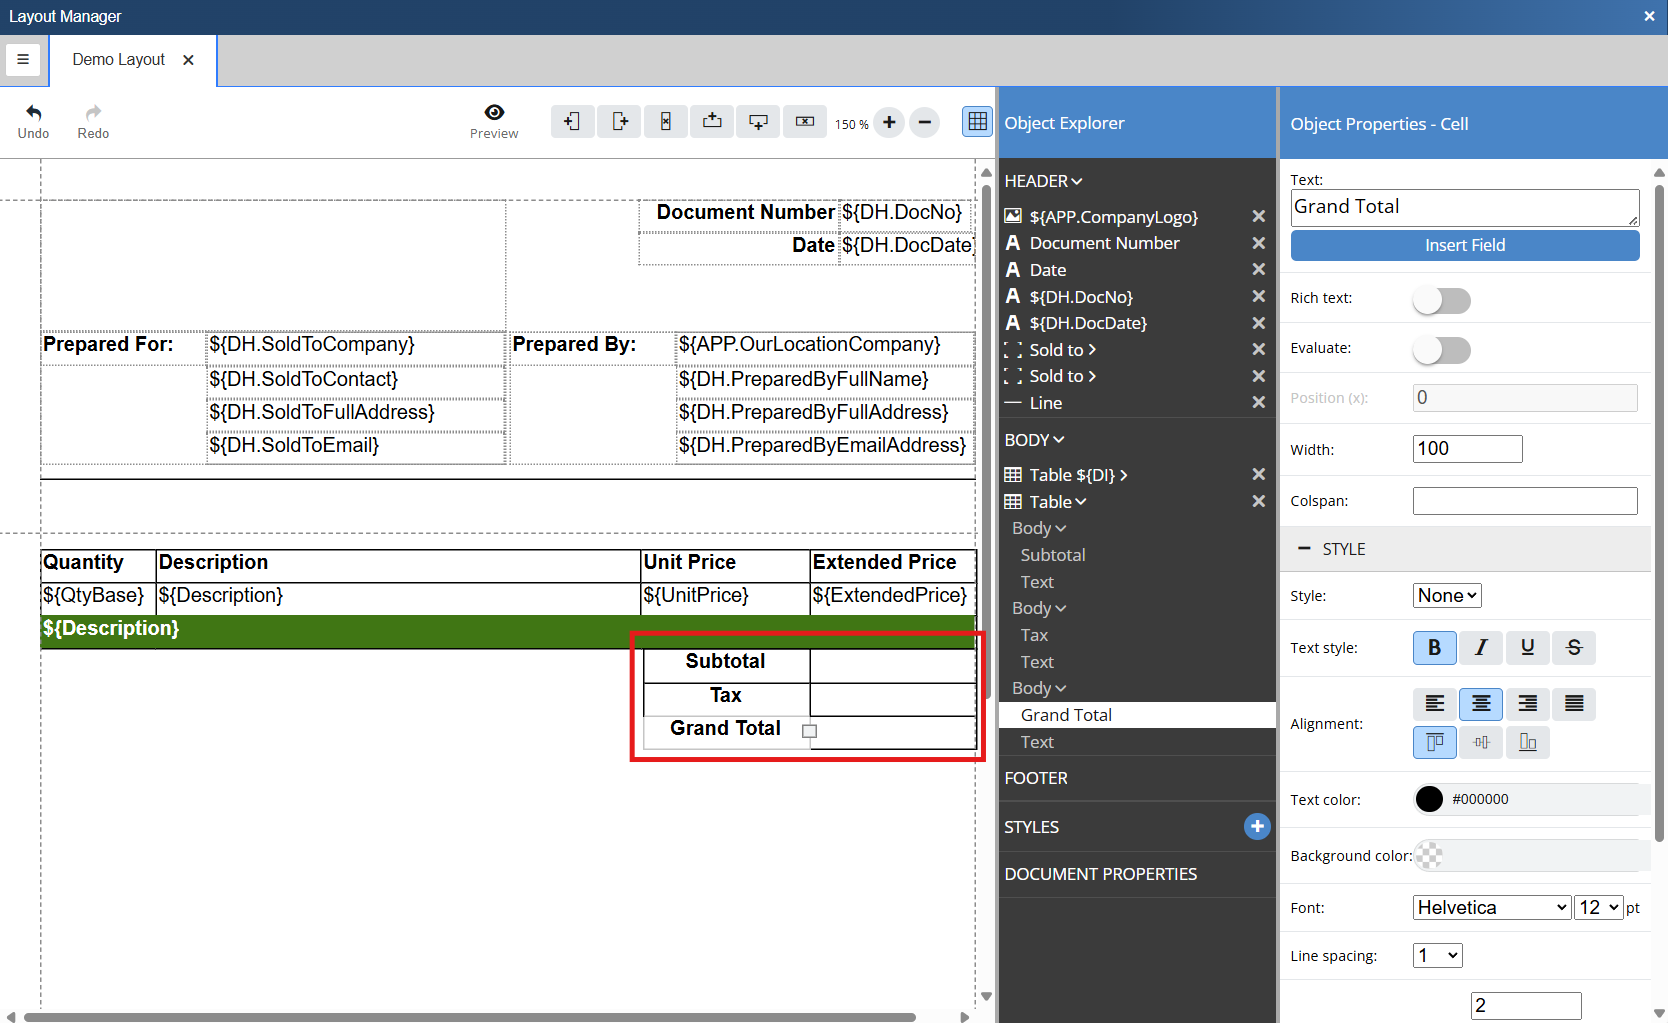
2. Populate the text labels by clicking into each of the rows in the left column and typing a value. For this demonstration we need to include a subtotal, tax, and a grand total.
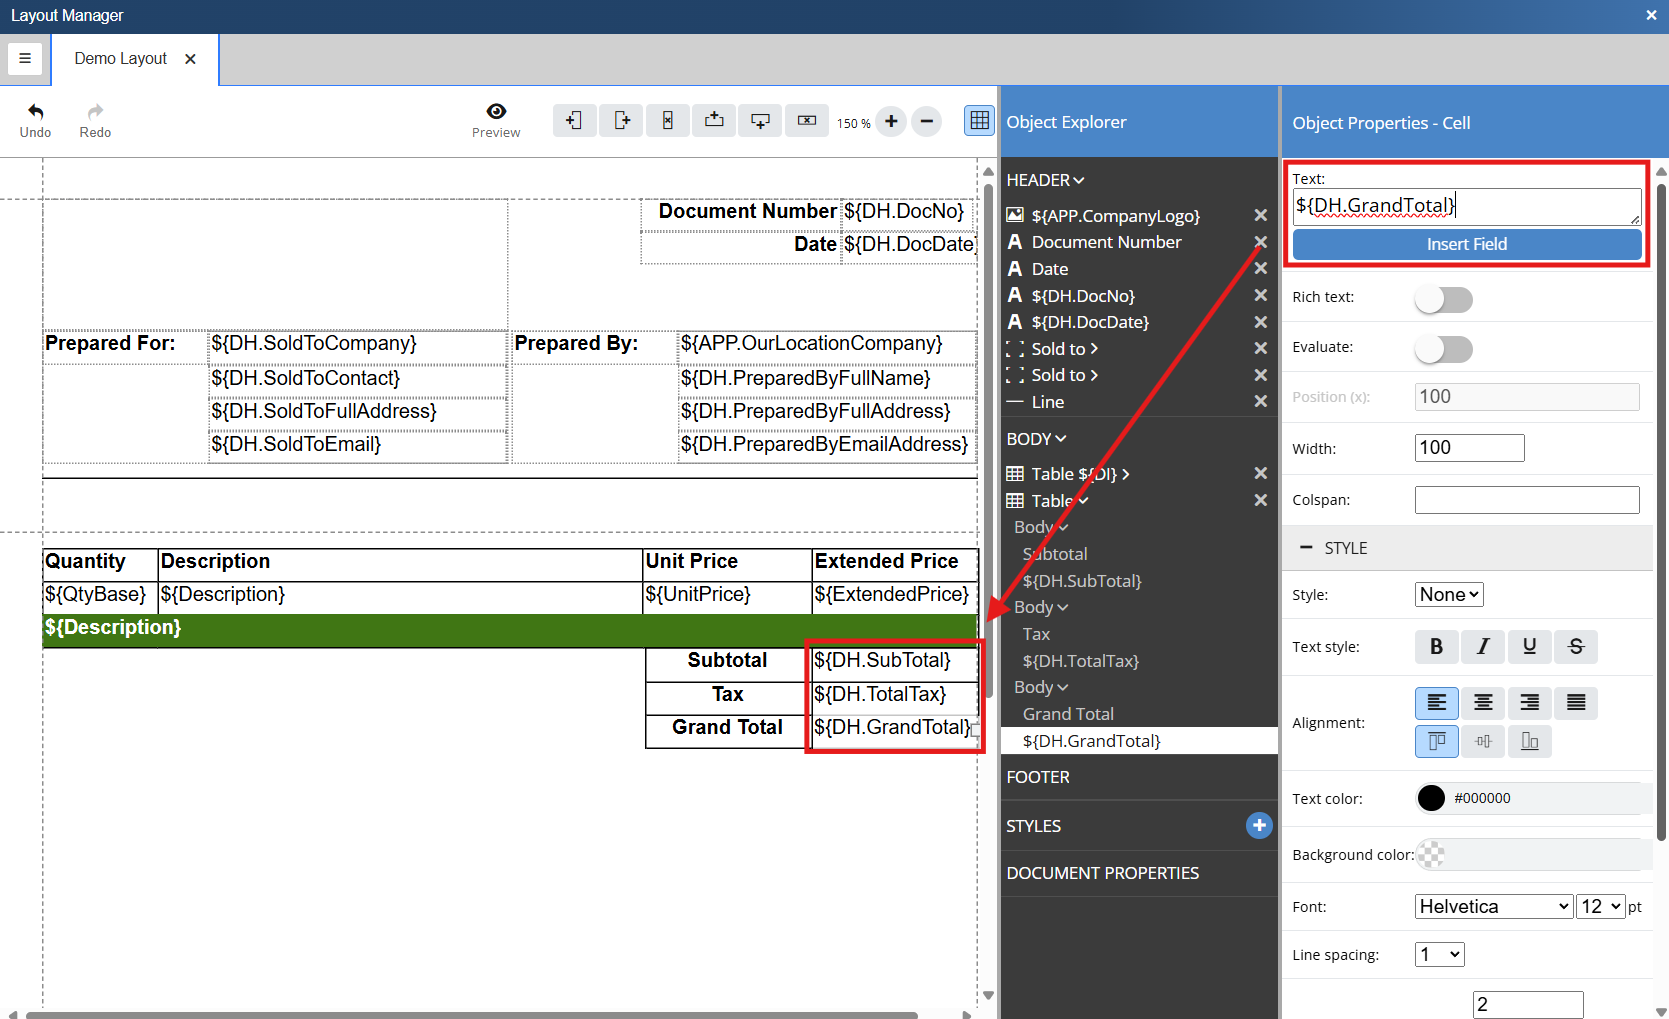
3. Populate the rows in the right column with the corresponding data fields by double clicking the cell and hitting Insert Field from the Object Properties - Cell selection panel.
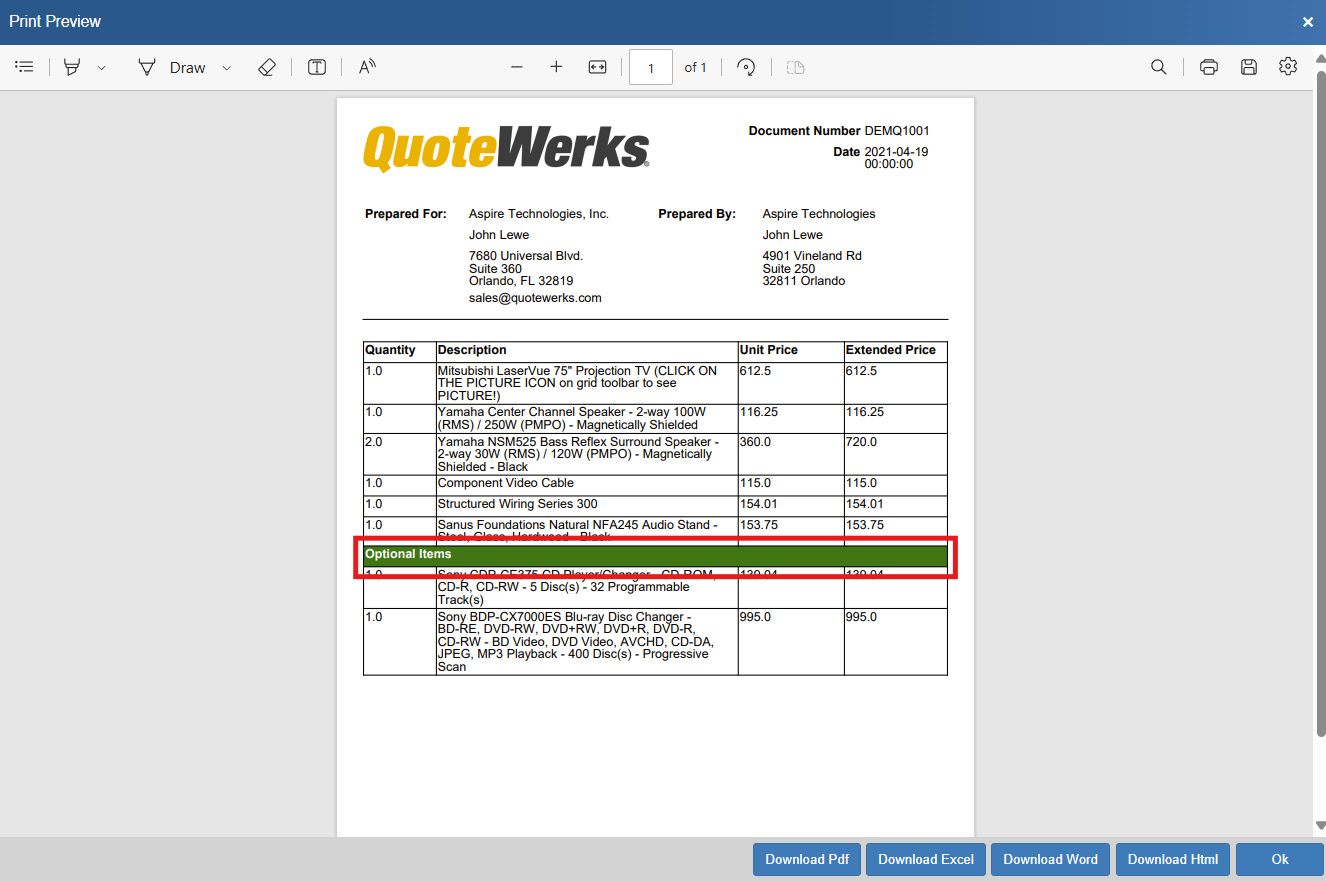
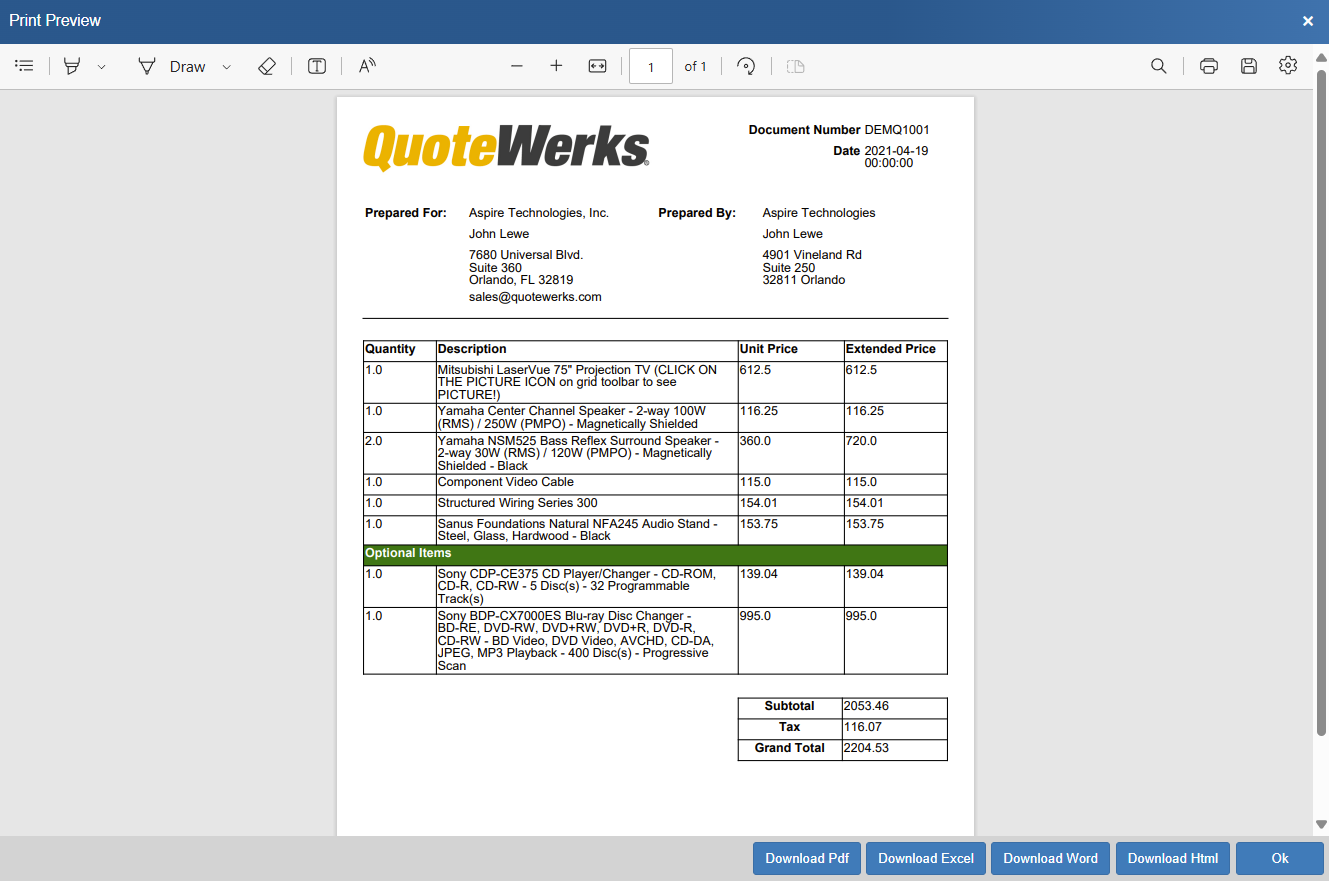
The layout will now print with the field data being pulled from the QuoteWerks system, as seen below.
Adding Content to the Bottom of a Document
You can add content print at the bottom of the document only after the item an total information has printed. This especially useful for terms and conditions, adding a line for the customer to accept the proposal, including closing text, and more. For the purposes of this demonstration we are going to add a few horizontal lines and a closing note from the closing text on the notes tab.
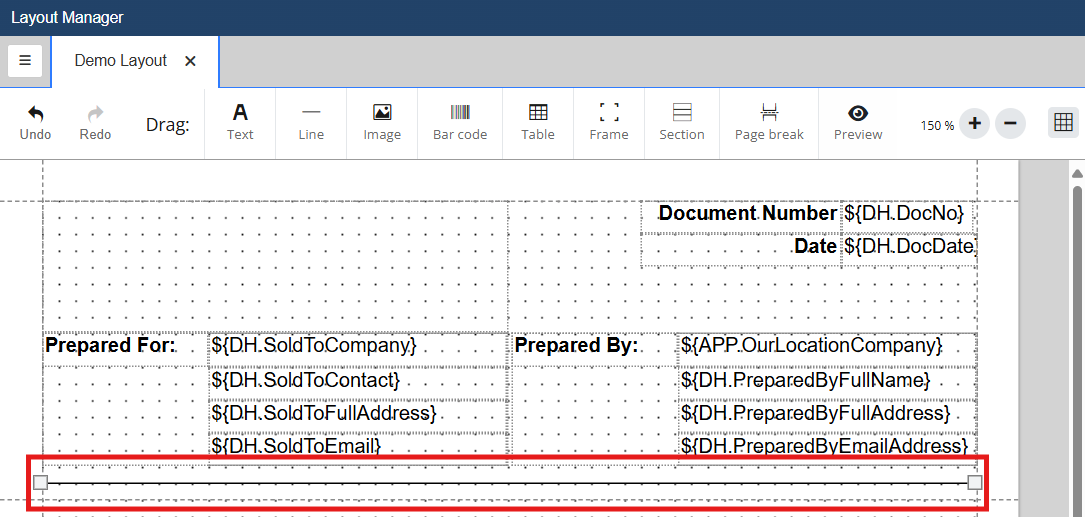
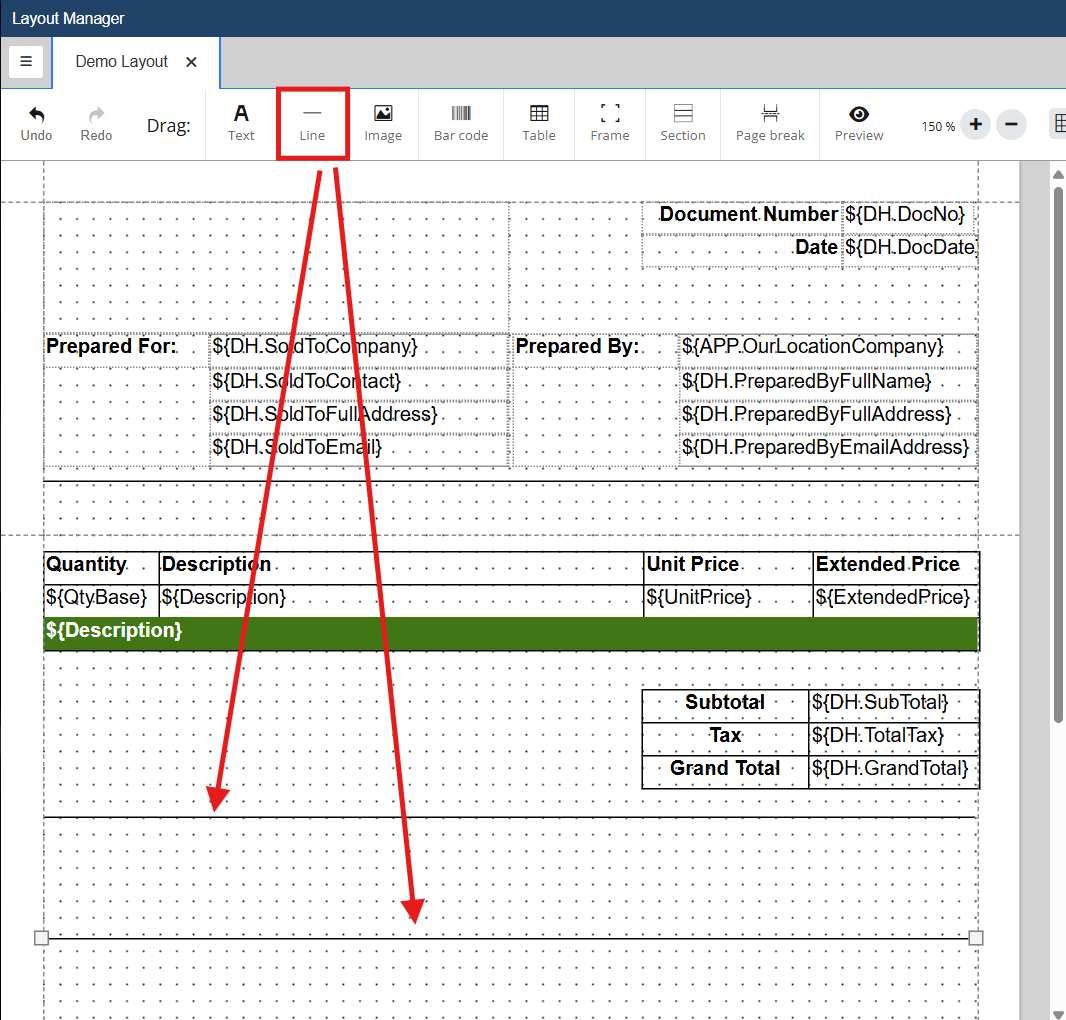
1. Insert Lines by clicking on the line button and dragging it onto the document, in the body. Resize the line to span the entire grid.
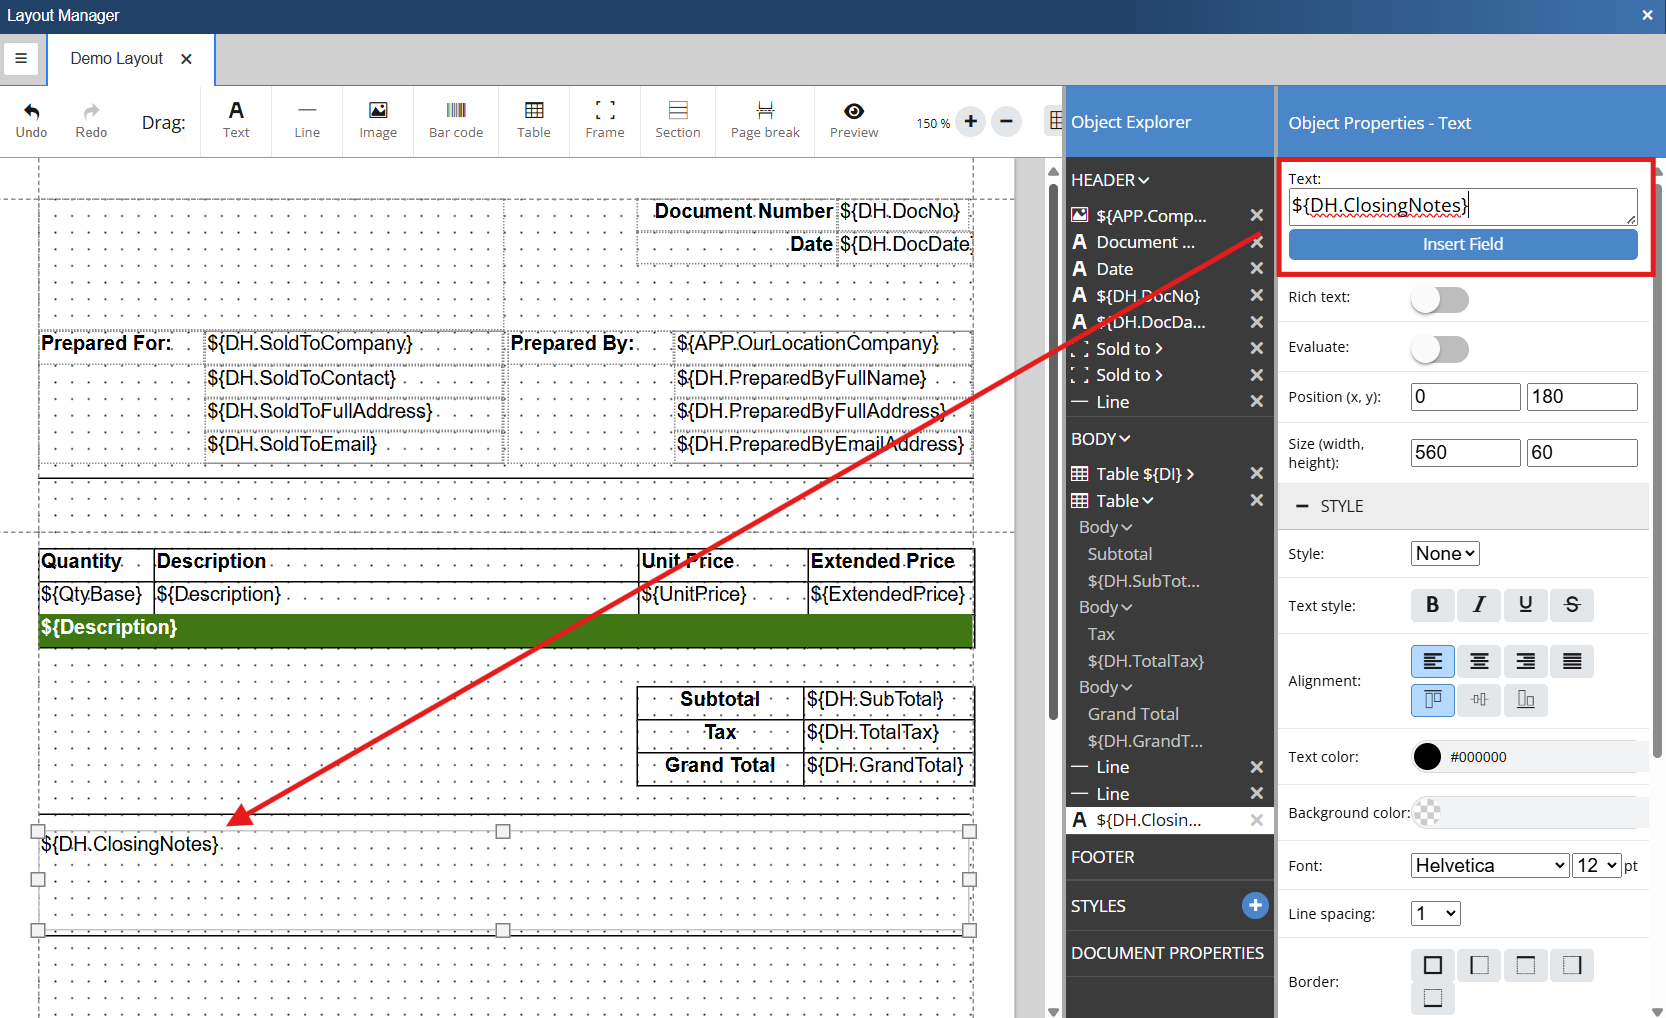
2. Insert a text box between the two lines, double click on the box, and find DH.ClosingNotes by clicking on the Insert Field button. This will insert the data field into the newly created text box.
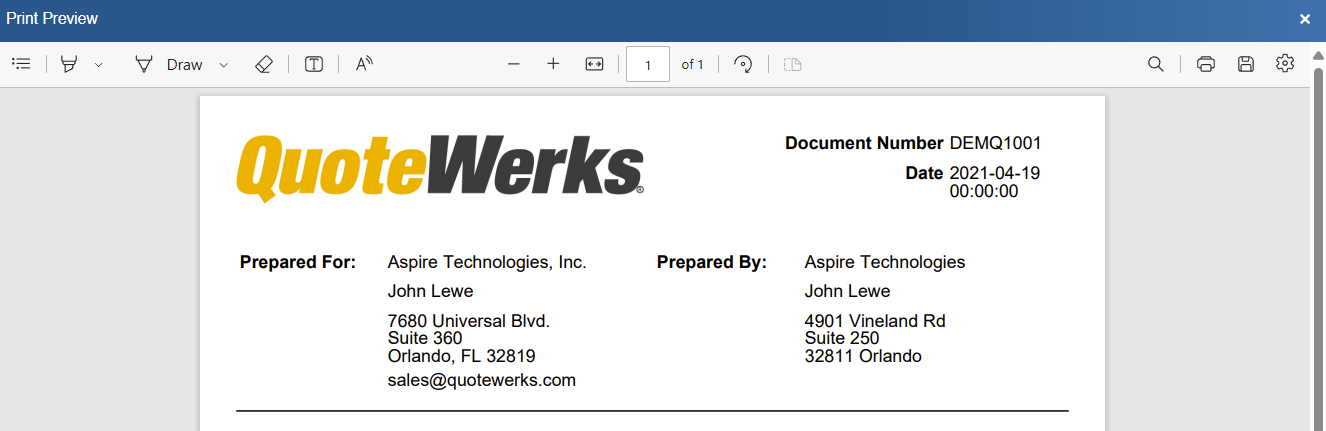
Now, the closing notes will print at the end of the document as seen below.
