You can select items from QuoteWerks Orders to send to Autotask in a purchase order. To do this, first make sure you have enabled this integration under Contacts -> Setup Contact Manager -> Autotask -> Autotask Setup -> Purchase Orders.

Step 1: Click on Tools -> Purchasing or the Purchasing Icon ( ) on the QuoteWerks main toolbar.
Step 2: Select whether you want to create a purchase order based on the currently open order (if applicable) or from multiple previous orders. Select your date range, select customer, and then finally the vendor for the order.
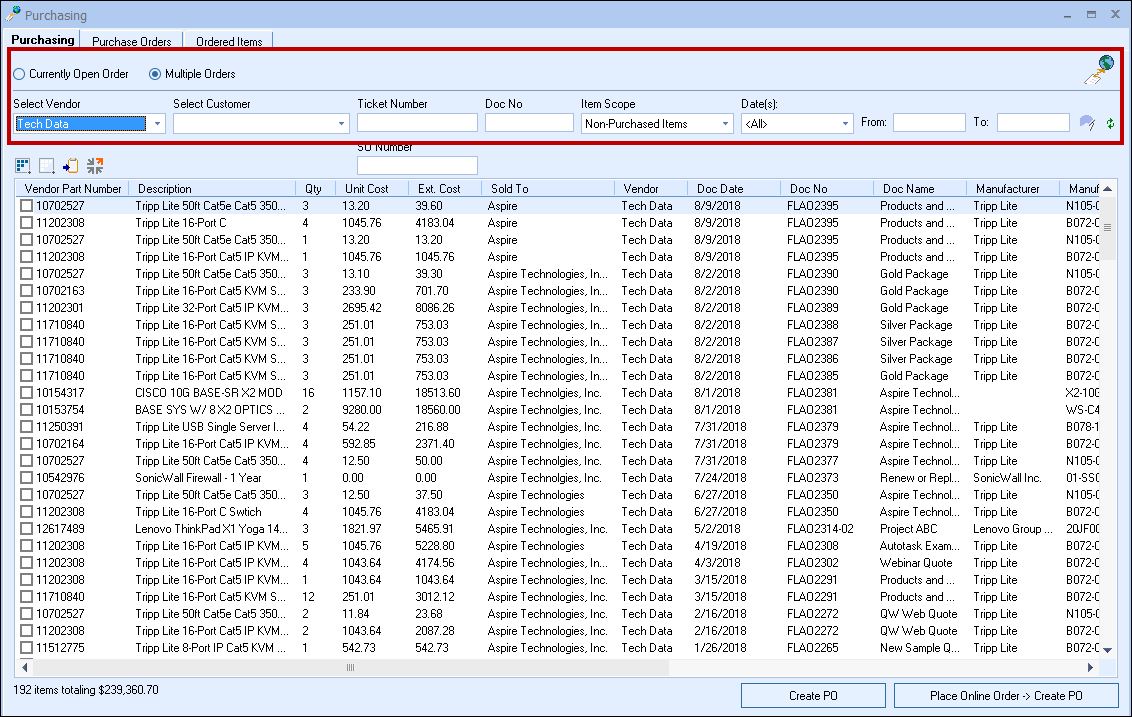
Step 3: Select your items from the results list. Check the boxes next to the appropriate items to include them in the purchase order.
|
|---|
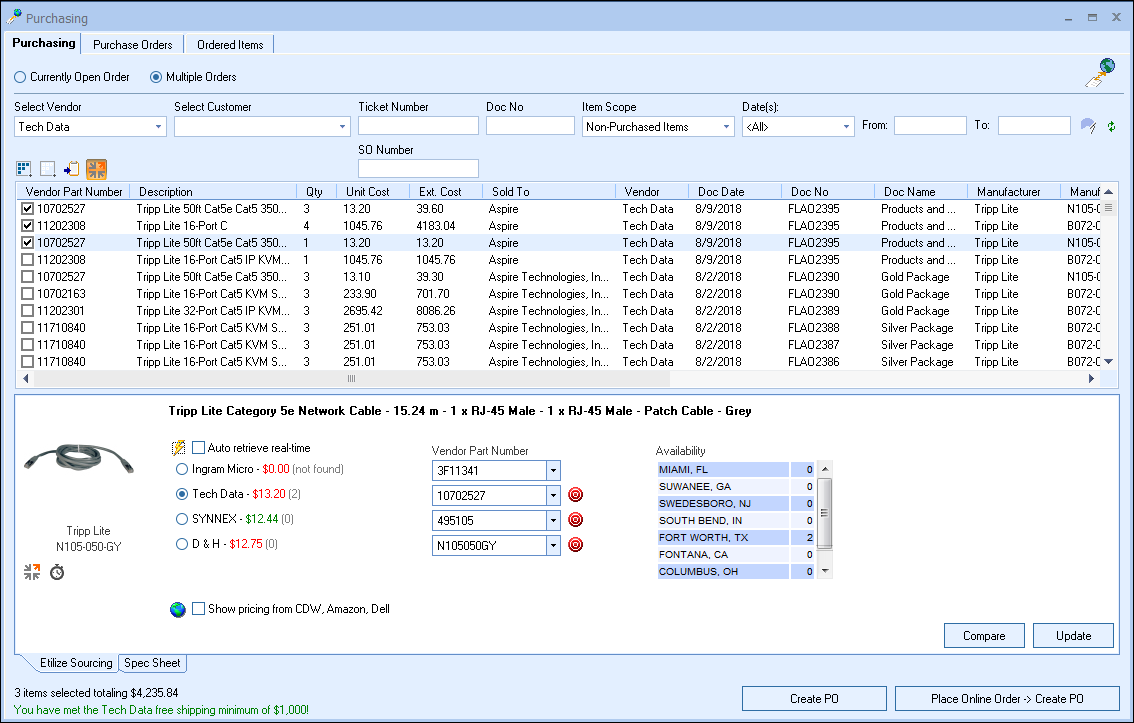
If you would like to check pricing and availability before sending the items to the Autotask purchase with Tech Data, Ingram Micro, SYNNEX, or D&H, click on the Product Sourcing panel button ( ). This will let you check/update pricing and inventory before submitting the purchase order.
Step 4: Click Create PO at the bottom right-hand corner of the window:

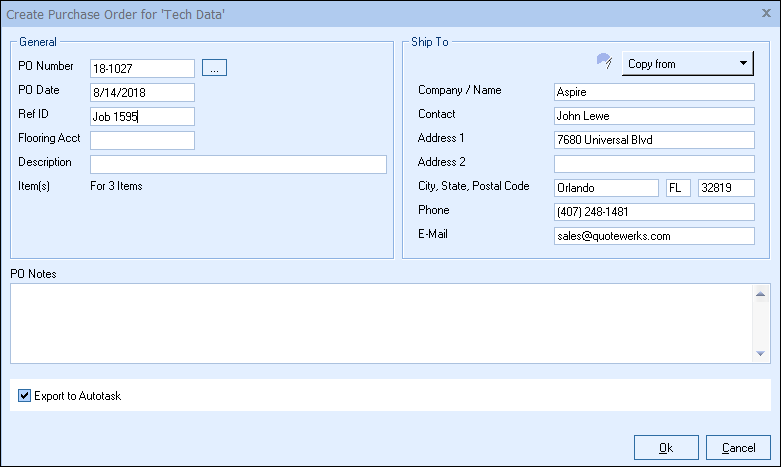
You'll see the Create Purchase Order window appear:
|
Enter the following information:
•PO Number: You'll use this value when creating a purchase order. If you're linking to QuickBooks, Sage 50 (Peachtree), Autotask, or ConnectWise, the same PO Number will be used when exporting to that application. You can set this number manually or, if you've set a default numbering sequence under Tools -> Options menu -> Installation tab, you can click the  button next to the Next PO number sequence field to select the next numerical value. Additionally, if you've set a PO Prefix/Postfix value under Utilities -> Vendor Maintenance menu, then this value will display with the PO number. For example, if you'd set the postfix to "TD" (for Tech Data), the PO number would read, "14-1001TD," where "14" indicates the year 2014 and 1001 represents the unique numeric sequence.This field also supports the F2 Lookup List feature.
•PO Date: The date of the purchase order. This will default to the day you're creating the purchase order, but you can manually change it. This date will also apply to any purchase order created in QuickBooks, Sage 50 (Peachtree), Autotask, or ConnectWise.
•Ref ID: In this field, you can enter a job or ticket number to group purchase orders. For example, you might create five purchase orders to purchase all the products required for the job, and by entering the same job number for each PO, you can easily group and display them together under the Purchase Orders tab. Filtering by RefID while under the Purchase Orders tab will show you the purchase orders linked by job number. Filtering by RefID while under the Ordered Items tab will show you a complete list of all the items ordered within all purchase orders.
•Flooring Acct: You can use this field to specify a flooring account when placing orders with Ingram Micro, D&H, and/or TD SYNNEX.
•Description: Here, you can enter a description of the purchase order.
•SO Number: Enter in the Sales Order number you would like to reference for all the items created in the PO.
•Dist SO#: Enter in the Distributor Sales Order number you would like to reference for all the items created in the PO.
You can also select Export to Autotask to export the purchase order to Autotask.
Click OK.

Important: In Autotask, you can create a manual purchase order by creating a new purchase order and then selecting items from the Autotask product list to add to the purchase order. This type of purchase order does not associate the added products with any customers/Tickets/Opportunities. When QuoteWerks creates a purchase order in Autotask, it creates it the same way as described above. |
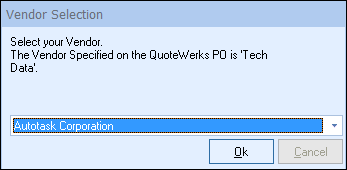
Step 5: The next window will let you select the Autotask vendor to be used for the purchase order, if you didn't select a vendor that already exists in Autotask.
Important: If the vendor on the QuoteWerks purchase order matches a vendor in the Autotask database, this Vendor Selection window won't appear; you will skip to Step 6. |
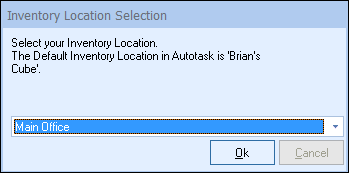
Step 6: The next window will let you select your inventory location.
Click on the [Ok] button once you have located your vendor.
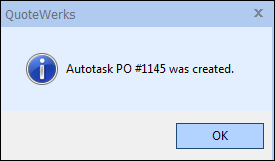
Step 7: A confirmation box will appear notifying you that your purchase order has been created for the selected vendor with the purchase order number you specified.
|
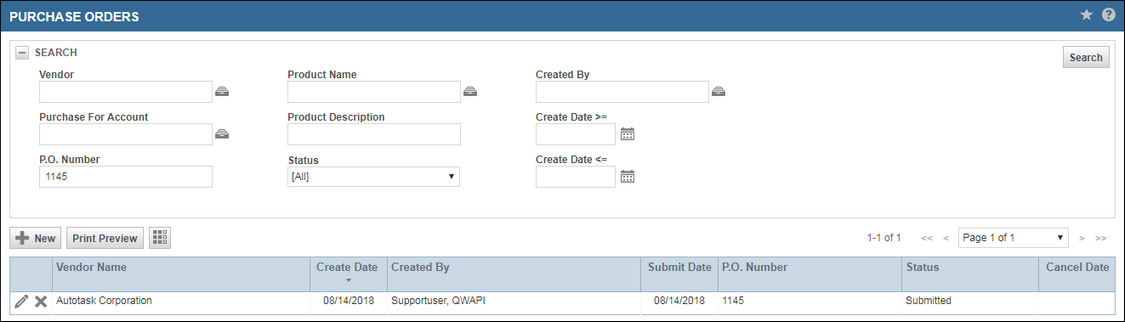
Step 8: To view the purchase order that was sent over to Autotask, open Autotask and click on the Inventory -> Purchase Orders menu. Enter your desired search parameters and hit [Enter] on your keyboard.
Clicking on the purchase order will open it in Autotask, listing the information about the purchase order from QuoteWerks, including a list of the purchase order's items:
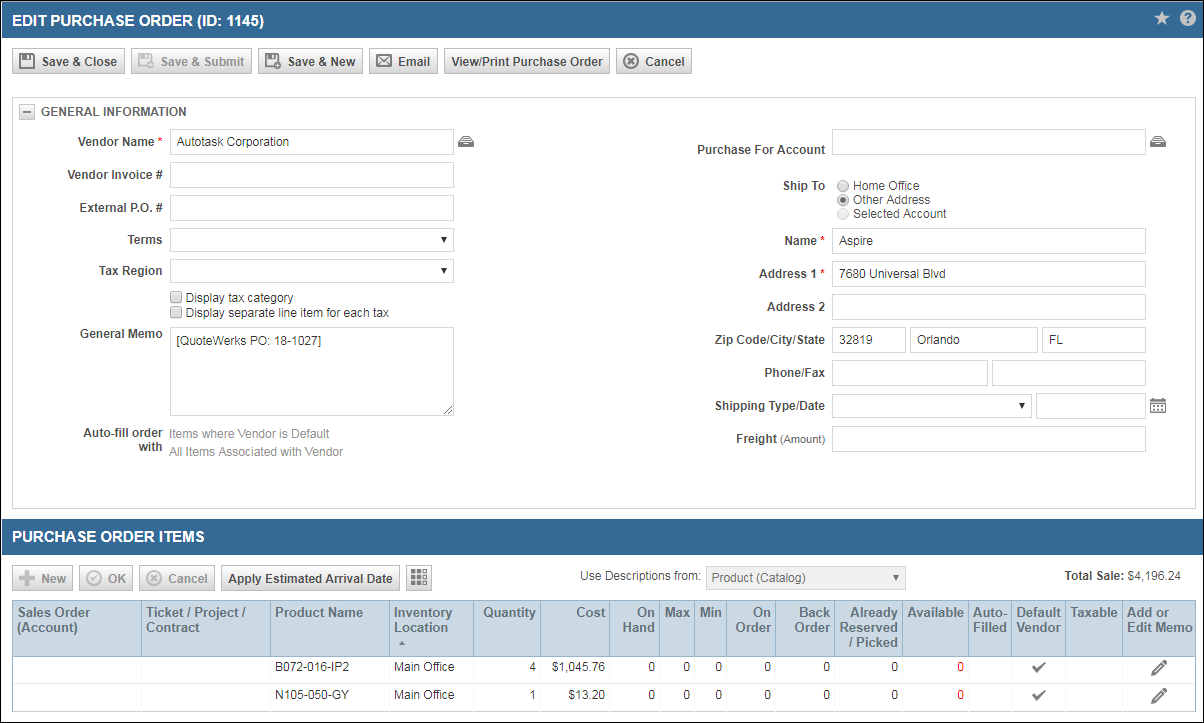
If you entered a description when creating the purchase order in QuoteWerks, that text will appear in the General Memo field in Autotask (shown above). The vendor part number will also be included.
|
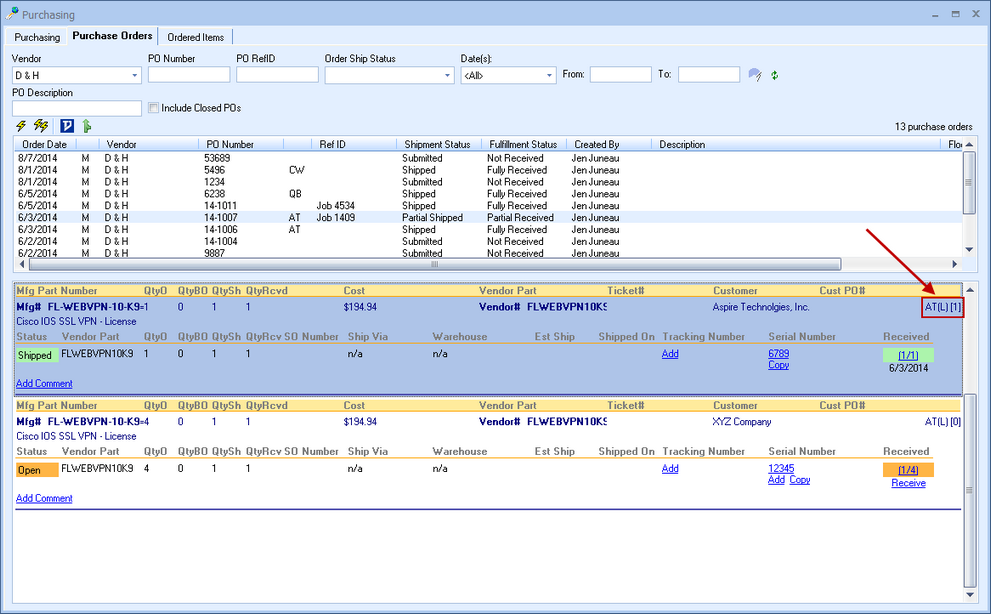
If the QuoteWerks purchase order item has been exported to Autotask as an item on an Autotask purchase order that QuoteWerks created, you'll see an indicator — "AT (L)" — on the right side of the item under the QuoteWerks Purchasing window's Purchase Orders tab. You'll also notice a numerical indicator to the right corner of the "AT (L)", which will display the quantity of that item that has been received in QuoteWerks but has not been sent over to Autotask as received yet. See Mark ItemReceipt as Exported to Accounting... for more information on doing this.
Important: Per normal Autotask behavior, once all the items on a purchase order have been received, you will not be able to edit that purchase order in Autotask. |
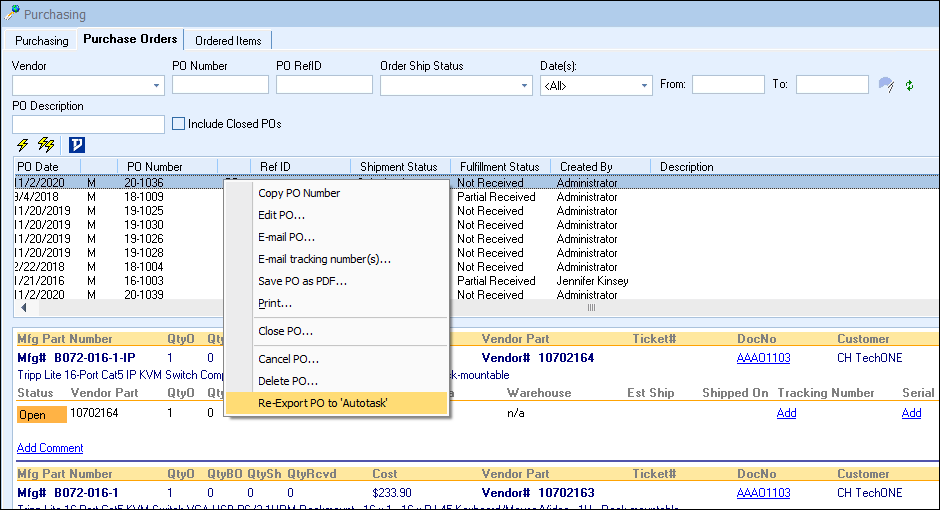
Re-Export PO to Autotask
Once a PO is sent to Autotask, the option to re-export becomes available. This is useful if the original PO did not export correctly and you need to send it over to Autotask again with the corrections.
To Re-Export a PO, click on the Purchase Orders tab in QuoteWerks, find the PO that needs to be re-exported, and right-click. Select the Re-Export PO to 'Autotask' menu option.
Important: When you re-export a PO to Autotask, this will create a brand new PO in Autotask, with a new PO number. You may need to delete or close the original PO in Autotask for your accounting records to be accurate. |