Select the Contacts -> Setup Contact Manager menu, and choose QuoteWerks as your preferred contact manager. Click on the [Import Contacts] button to start the Contact Import Wizard.
|
Step 1: Selecting the Source

You will begin the process by selecting the text file that you wish to import. You can select the file manually, or load a template that you saved previously. See Templates for more details.
After you have selected the text file, QuoteWerks will attempt to determine if it is comma or tab- delimited. QuoteWerks will also attempt to determine how many columns of data there are in the text file. QuoteWerks will display the delimiter and number of columns that it found on this window. If you believe that QuoteWerks did not correctly detect the settings, you may change the settings.
Step 2: Mapping
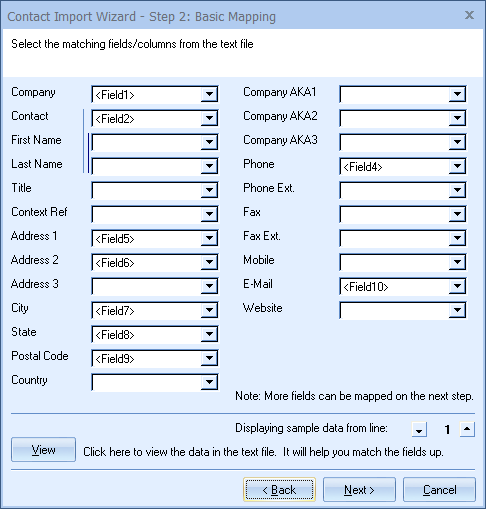
On this window, you will tell QuoteWerks how the columns of data in the text file will pair up with the fields in QuoteWerks that are used to store the contact name, company name, address, etc.
For example, click on the drop down arrow next to the “Company” label to select which column of data in the text file should be imported into the “Company” field in QuoteWerks.
Important: The Company field is a required field for the QuoteWerks Contact Manager |
When you click on the drop down arrow, you will notice sample data from the text file displayed next to each field number. This sample data is provided to help you determine which text column/field you will want to import into this field. QuoteWerks samples the first 20 rows of data in the text file. Use the up and down arrows located at the bottom right of this window to change the row used for sample data that shows up next to the column number.
Step 3: Advanced Mapping
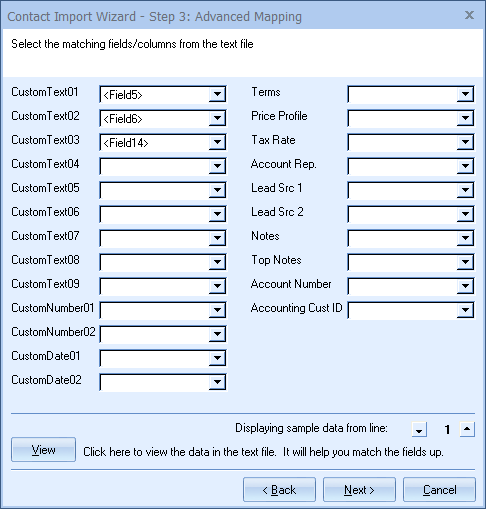
The Advanced Mapping window allows you pair up additional columns, such as the Custom fields, Terms, Tax Rate Account Rep, Notes, etc.
|
On both Step 2 and Step 3, you can click on the [View] button to see what the raw data looks like in the text file:
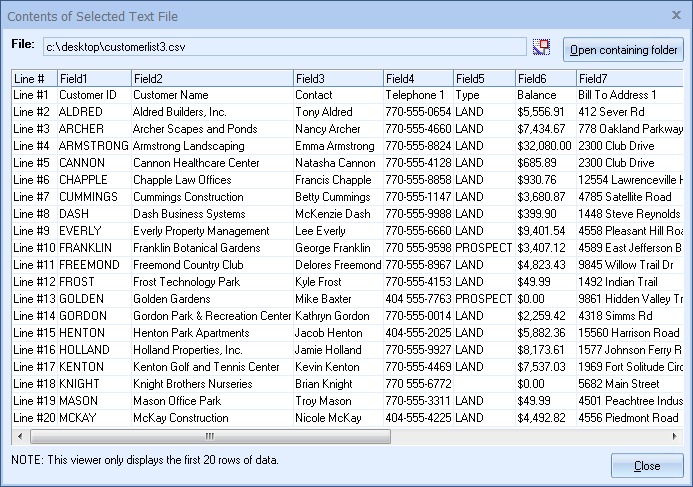
This can be useful when attempting to map fields.
Step 4: Options
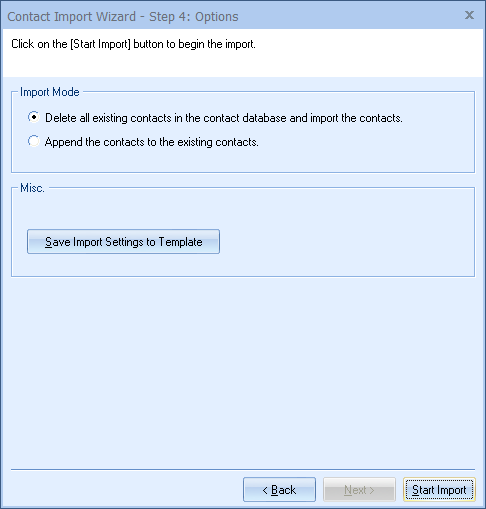
The Options window allows you to set the Import Mode and allows to you choose whether to save the Import Settings as a template.
Delete all existing contacts in the contact database, and import the contacts.
Select this option to delete all the existing contacts in the contact database before beginning the import of the new contacts. Keep in mind that if you have made any changes to the contacts that already exist in the database, deleting them will cause you to lose these changes.
Append the contacts to the existing contacts.
Select this option to only add the contacts from the text file into the contact database. QuoteWerks does not check to see if the contacts that you are adding already exist. If the contact does already exist, duplicate entries will appear.
Save the import options to a template before starting the import
To save the wizard settings, select the [Save Import Settings to Template] button and specify a file name. The next time you need to import the data you can load this import template and start the import process with only minor modifications. The contact import template files are stored in the SystemSettings table under the SectionName Contact Import Templates.