Synchronizations can be performed between Master and Remote Site installations, between Master and Remote PC installations, and between Remote Site and Remote PC installations. Remote Site installations cannot synchronize with another Remote Site installation. Remote PC installations cannot synchronize with another Remote PC installation.
The process of synchronizing document and product data is driven from the remote side, not the master side. What this means is that to synchronize data you need to be running the remote installation copy of QuoteWerks and choose the master installation to synchronize with. If you are synchronizing between a Remote Site and a Remote PC installation, then you must be running the Remote PC installation to initiate the synchronization.
|
Important: Currently in order to synchronize a remote to a master installation they have to be on the same network. Either the remote user comes into the office periodically and can sync or they will have to have a VPN (not supported by Quotewerks support) in order to mimic being in the office to perform the sync. The user has to be able to browse to the Master installation folder. |
Step 1: Start the installation of QuoteWerks located on the laptop.
|
Step 2: Welcome to the QuoteWerks Synchronization wizard
Select the Utilities -> Sync menu. The wizard’s Welcome step will appear:
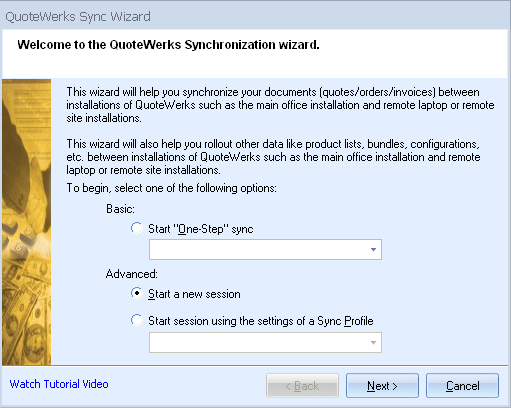
Start "One-Step" sync
This is the fastest way to initiate the synchronization process. Simply choose the sync profile to use and click on the [Finish] button. This will use all the synchronization settings defined in the sync profile to run the synchronization.
|
Start a new session
Choose this option to begin a fresh Synchronization session.
Start session using the settings of a Sync Profile
Choose this option to load in the settings from an existing Sync Profile. You can then make changes as you progress through the wizard and save the changes to the existing profile or a new profile.
Click on the [Next] button to continue.
|
Step 3: Select Installation to Synchronize with
On the next step, select the folder where the QuoteWerks master installation is installed to:
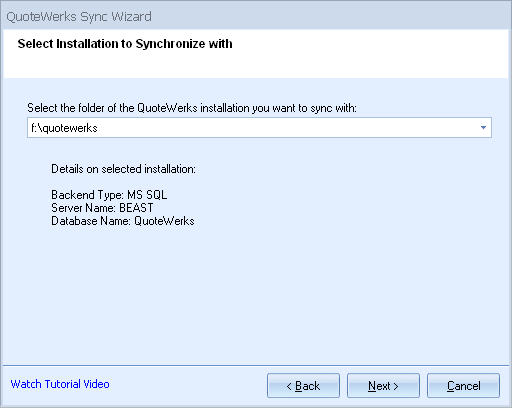
Click on the [Next] button.
Step 4: Synchronize Documents
On the next step, select the documents to sync:
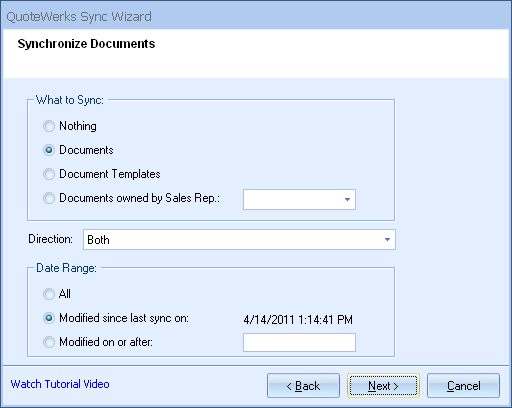
You can choose the direction to sync, so you can sync the documents from the remote to the master or from the master to the remote and in both directions.
Syncing Document Deletions
Starting with version 4.6 Build 5, The synchronization of documents like quotes/orders/invoices will propagate document deletions out between the master installation, remote site installation, and remote pc installations. All deletions are recorded and then propagated when the sync process is run. It will not retroactively apply deletes that happened before build 5 was installed. Deletions on the master will propagate out to the remote laptop installation, and also any quotes deleted from the remote installation will be deleted from the master installation. Security rights determine if a user can delete quotes. Before a quote is deleted, a backup is made of it in the \QuoteWerks\DTF folder like jbnlQ1001.b01 just in case it needs to be recovered.
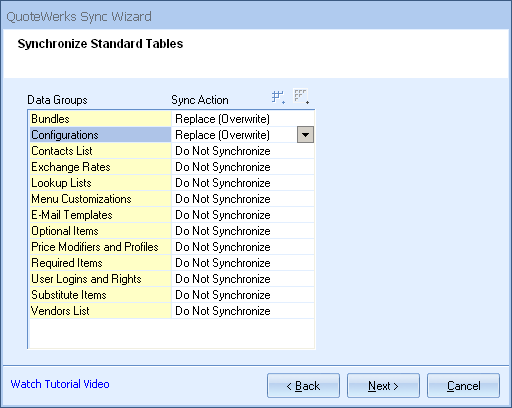
Step 5: Synchronize Product Data Sources
|
On this step you can select which product databases you would like to sync:
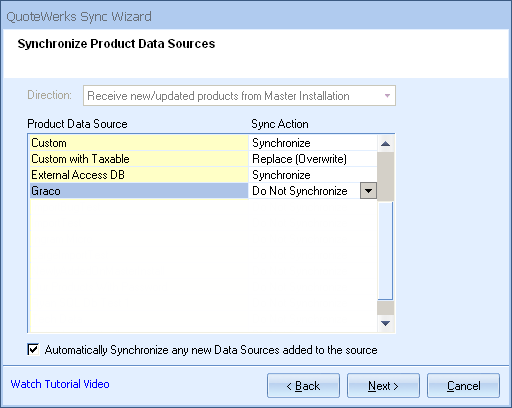
You are only able to sync product databases from the server to the remote, the remote cannot sync their local product databases back to the server. All of the Product Data Sources that currently exist in the Master installation will be displayed.
There are 3 sync actions: Synchronize, Do Not Synchronize, and Replace (Overwrite).
For QuoteWerks Native product databases, the “Synchronize” action will update existing products in the remote product database and add new products to the remote product database, but will not delete any products from the remote product database. The “Do Not Synchronize” action will not synchronize the specified product database. The “Replace (Overwrite)” action will completely overwrite the product database on the remote with the database on the master. If any products were removed from the master and those same products need to be removed from the remote, you will need to choose the “Replace (Overwrite)” action.
QuoteWerks Product Data Sources can also be external files like an Microsoft Access file or Excel file. If you choose to synchronize a Product Data Source that is linked to an external Microsoft Access or Excel file, the entire file will be replaced by the file from the master installation as long as the date/time of the file from the master installation is newer. If you choose to overwrite this Product Data Source instead of synchronizing it, then the file on the remote installation will be replaced regardless of the date/time of the file.
Additionally, if utilizing the My Favorites folder for Etilize, these items can also be synchronized.
Automatically Synchronize any New Data Sources Added to the Source
When setting up a Synchronization profile for a remote installation, any Product Data Sources (PDS) available at that time will be included in the sync profile. In the future, more PDS may be added to the master installation. With this “Automatically Synchronize any new Data Sources added to the source” option, those new PDS will also be automatically synchronized to the remote. Without this option, the only PDS that will be synchronized are the ones that were specifically selected to be synchronized. The real importance of this feature is that with this feature, the QuoteWerks administrator does not have to continuosly update the sync profiles for remotes every time the administrator adds a new PDS to the master installation.
Step 6: Rollout Data
|
On this step, you can select what data you want to rollout to the remote installation.
|
Bi-directional Synching for E-mail Templates
E-mail templates (also email snippets and email signatures) can be rolled out (replace) to remote installations or bi-directionally synchronized (including deletions).
Click on the [Next] button to continue.
Step 7: Synchronize Files
On this step, you can select which files you would like to sync with the master installation. This includes your document layouts, cover pages, literature documents, spec sheets, images folder, reports, and the resource templates.
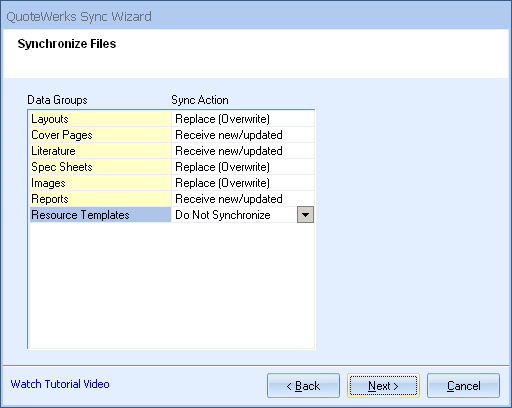
Users will be able to either replace (overwrite) the files, receive the new/updated files or not sync any of the documents.
|
Step 8: Options
The options screen will give users the options of replacing the SystemSettings on the remote installation as well as the {username} UserSettings. If these checkboxes are chosen the user will lose any customizations they have made to their existing QuoteWerks installation.
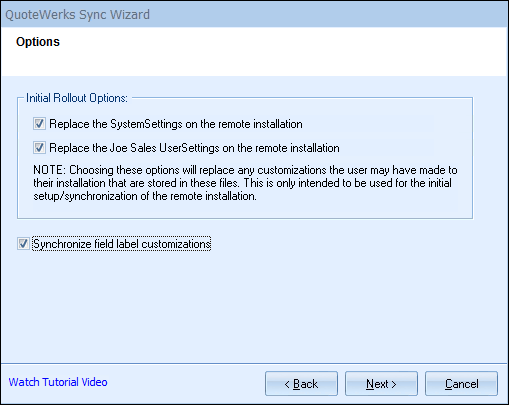
Users also will have the option to sync the field label customization so the remote users will not have to make changes to any label names manually.
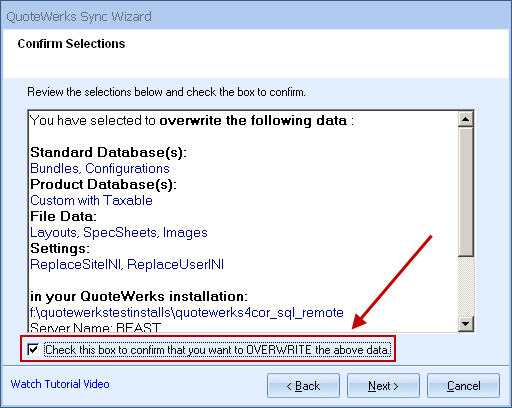
Step 9: Confirm Selections
If you have selected any options that will Replace (Overwrite) any data, you will be prompted to confirm your selections by checking the confirmation checkbox:
Click on the [Next] button to continue.
Step 10: Ready to Synchronize
On this step, you will have the option to save the synchronization settings to a synchronization profile so that the next time you want to perform this synchronization, you can just load the profile and run it without having to redo your selections.
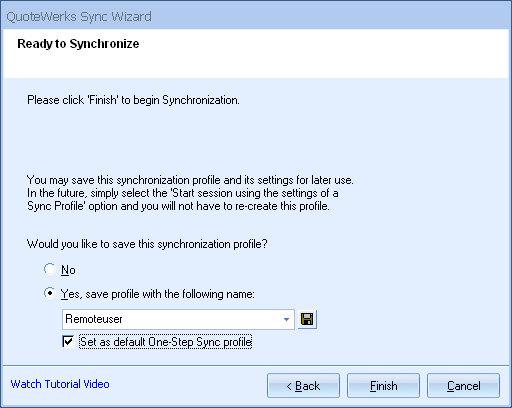
Click on the [Finish] button to start the synchronization process.
|
When the process is complete, you will be prompted to view the log. You can view the log again later by selecting the Utilities -> View Logs menu. Each time the synchronization is run, the data will be logged into the sync.log file. Before each synchronization, the existing log file will be renamed following the naming convention: Sync_yyyymmdd_hhmmss.log