Snippets are a great way to centrally organize and maintain information that is used in multiple email templates. For example, if you have several email templates that need to include the same information, such as product updates, instead of typing that same information into multiple email templates, you can create a single Snippet and add it to each template as a macro. Then when you need to make a change to that information in your templates, you can simply make changes to the information in the snippet and the changes will automatically appear in the two email templates.
Creating New Snippets
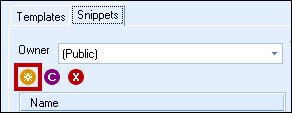
To create a new Snippet, first choose the “Snippets” tab from the Tools-> Customize Email Templates menu option. Choose which user you would like to create the new Snippet for under the “Owner” drop down menu and then click on the  button to create the new snippet. This will create a blank snippet.
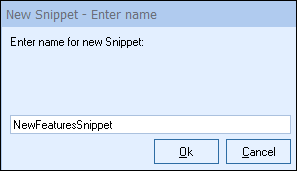
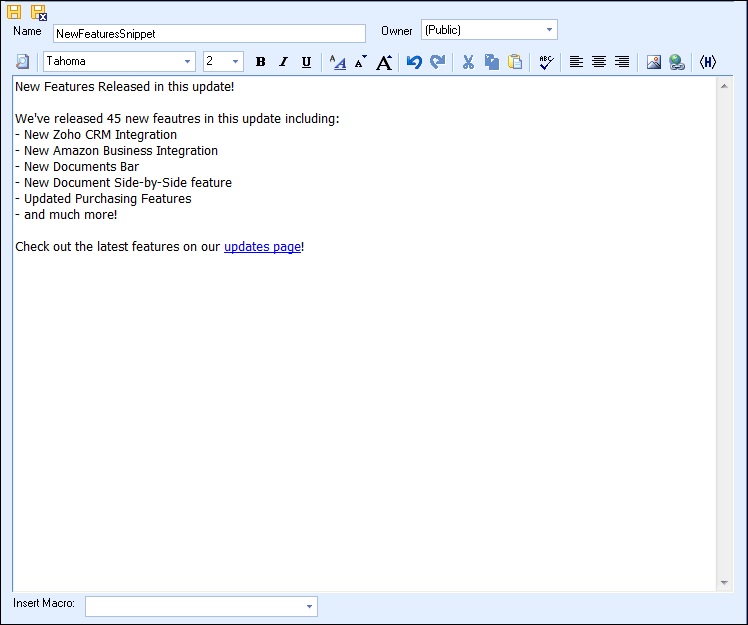
Once you have created the new snippet you will be prompted to enter a name for this snippet. This name will be the name of the snippet when adding it to the email template. Be sure to name it something you will recognize.
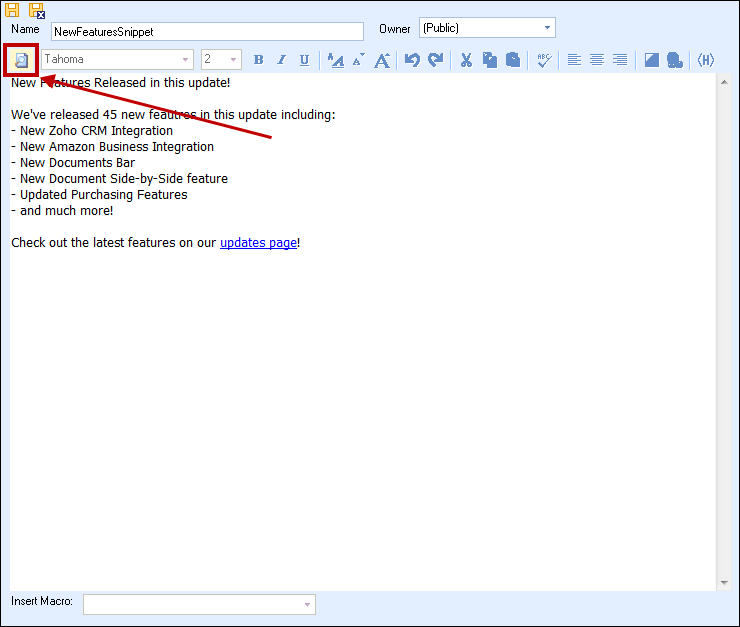
After the Snippet has been created you will be able to change the owner by selecting the drop down menu to the right of the Snippet name. You will also now be able to save the Snippet and any changes by clicking on the  icon or the
  icon to save and close the edit window.

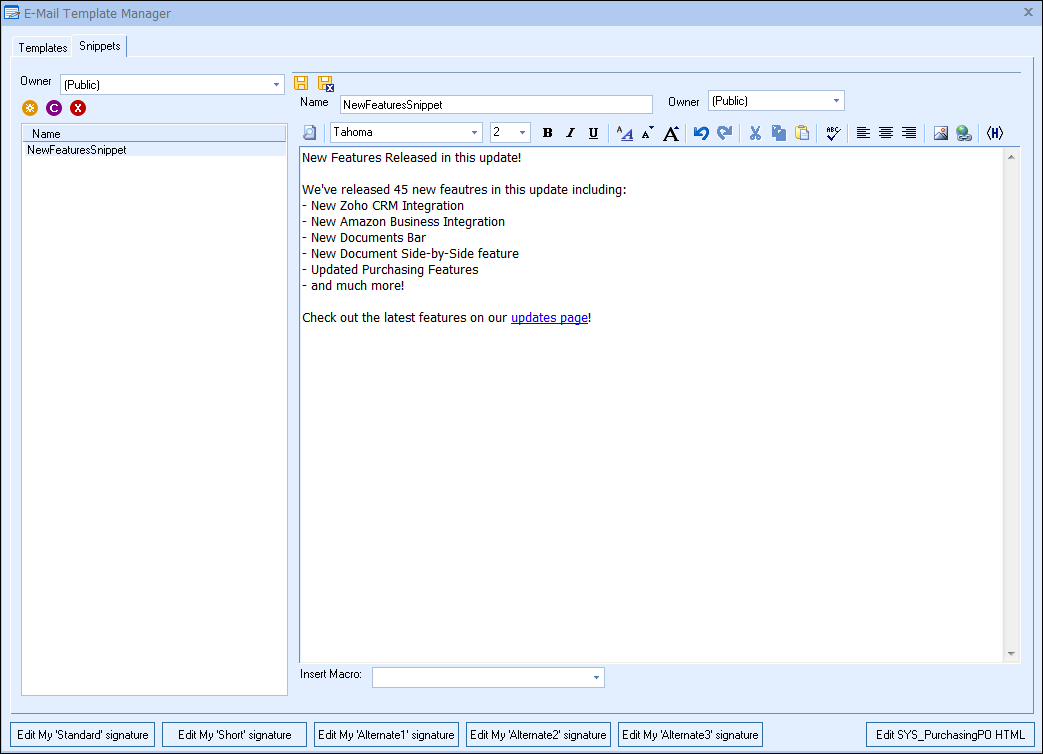
The next section of the Snippet window will allow you to customize the template. The window has a full toolbar that includes the ability to change fonts, sizes, cut, copy, paste, spell check, etc. You can also insert pictures and web links. Users also have the ability to switch the Snippet into HTML code as well.
At the bottom of the Snippet editing window is the “Insert Macro” drop down menu. This menu allows you to choose from any of the available macros in QuoteWerks and add them into your Snippet.
Users can also preview the Snippet to see what it looks like by clicking on the  icon on the toolbar. This will preview the document with all the macros filled in so you can make sure it looks correct before finalizing the Snippet.
Adding Snippets to E-Mail Templates
To use a created Snippet in an email template, open the template you wish to add to an email template. At the bottom of the email template window click on the drop down menu and look for the “MySnippet” and/or “Public Snippet” macro:
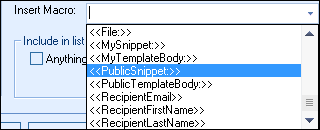
The MySnippet macro refers to a Snippet created under the current logged in user’s snippets. The “Public Snippet” macro refers to the public snippets that are available to all users.
Once the snippet macro has been added to the email template you will need to enter in the snippet name. The macro should look like this:
<<MySnippet:SnippetName>>
<<PublicSnippet:SnippetName>>
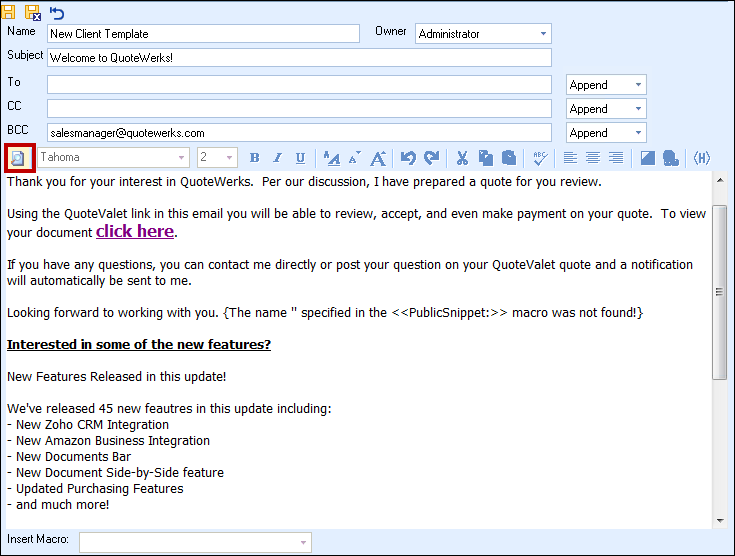
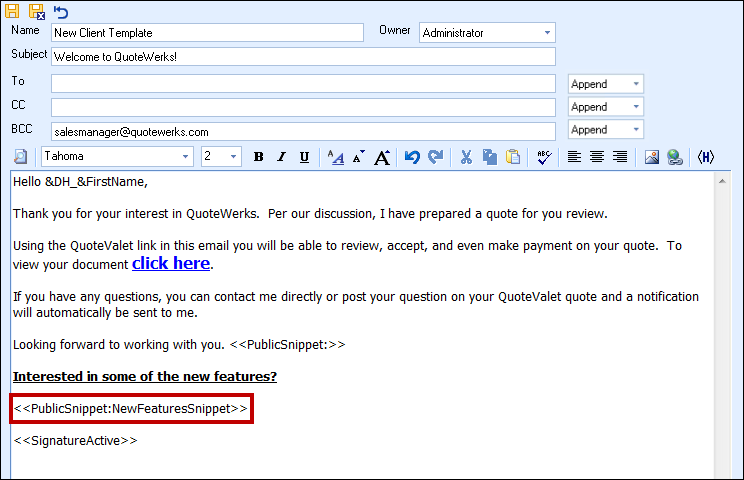
For example a Public Snippet named NewFeaturesSnippet should look exactly like this:
<<PublicSnippett:NewFeaturesSnippet>> when added to an email template.
After adding the snippet to your selected email template, you can use the  button to preview the template with the snippet included.