Important: You must have administrative rights on the computer to install Microsoft SQL Server/SQL Server Express 2012 -2019 |
Before you can re-host to the SQL backend – which you can use with the Corporate Edition of QuoteWerks – you must install Microsoft SQL Server/SQL Express.
It is important to note that QuoteWerks does not require the version of SQL Server on the remote installation system to match the version of SQL Server on the master installation server to be the same. Obviously though, running the same version on both your master and remote installations would keep it simpler.
To install Microsoft SQL Server 2019 (including Express):
1.Download latest version Microsoft SQL Server or SQL Server Express at:
https://www.microsoft.com/en-us/sql-server/sql-server-downloads
2.Once the application is finished downloading, browse to its location and double-click to begin the installation process.
Step 1: Once you initiate the install package, the SQL Server Installation Center window will appear.
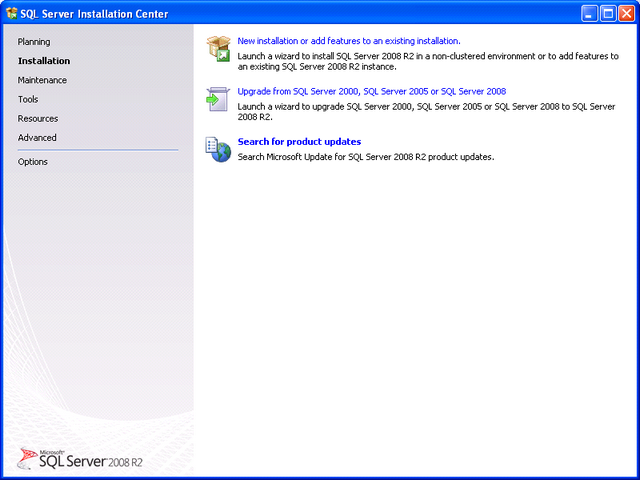
Click New installation or add features to an existing installation. The installer will run through system verification, ensuring all proper components have been installed. If you followed steps a thorough c on the previous page, everything should verify successfully.
Step 2: Read the license terms and select I accept the license terms.
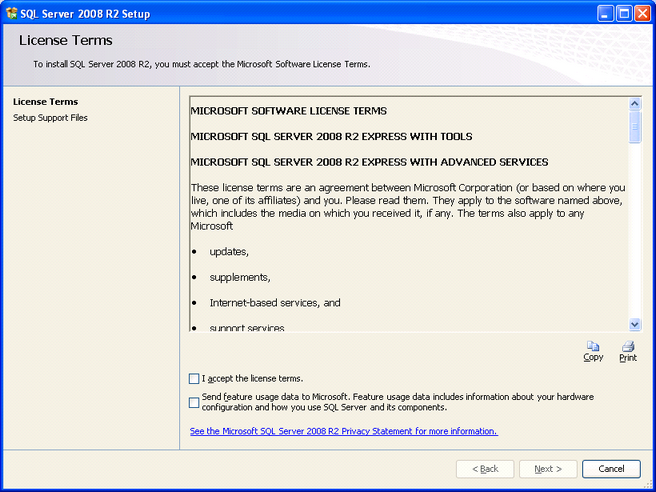
Click on the [Next] button.
Step 3: The SQL Installer will again verify that the proper components are installed for the SQL installation.
|
Step 4: On the next window, you’ll be prompted for the various components of SQL Server to install. We suggest enabling all feature selections, as they’ll all prove valuable in managing the SQL Server database.
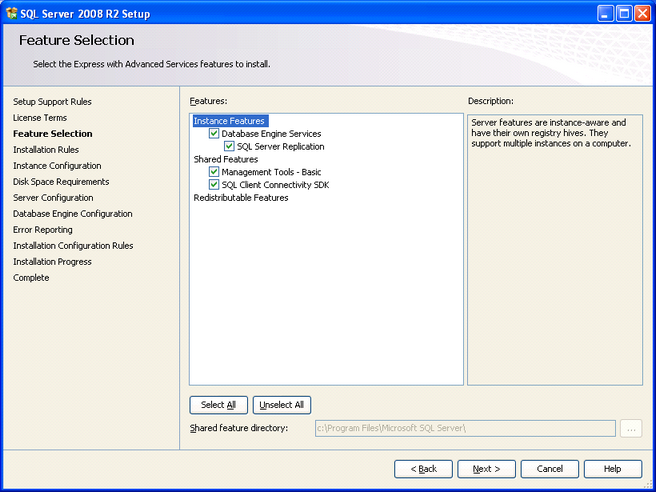
Click on the [Next] button to proceed.
Step 5: On the Instance Configuration window, elect to accept the defaults of having a named instance of “SQLExpress” (if you name it otherwise, please make note of the changes made to the installation process).
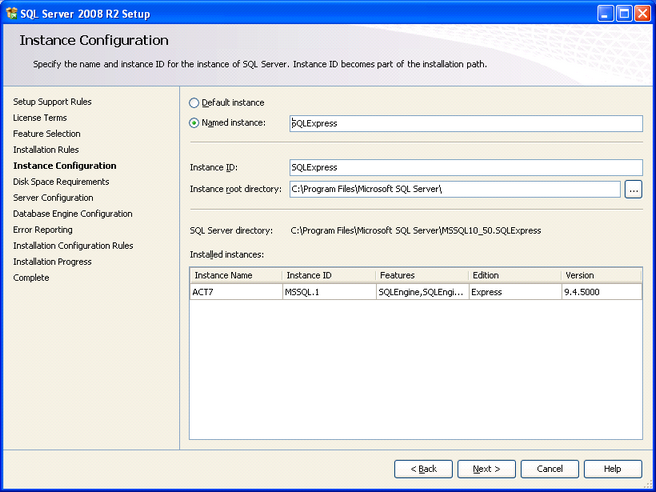
This window also displays any other SQL Server installations on the machine. We suggest creating a dedicated install of SQL Express specifically for QuoteWerks, to avoid conflicts.
Click on the [Next] button to proceed.
Step 6: On the Server Configuration window, click the appropriate account name to allow the Database Engine start-up as a Network Service (do not need to provide a password) to avoid permissions and service conflicts. You can give it another account, but ensure the account is an admin one and has a properly secure password set.
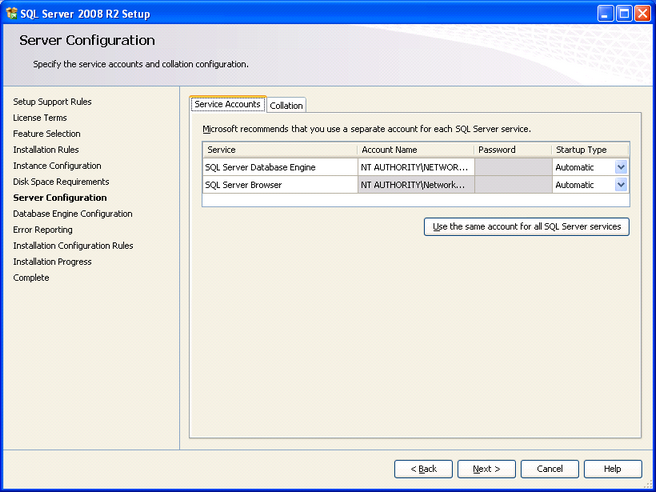
Accept the defaults on the Collation tab, then click on the [Next] button.
Step 7: For QuoteWerks to use the SQL Server backend functionality properly, you must select Mixed Mode (SQL Server authentication and Windows authentication). The SA account will also need to be provided with a password (DON’T LEAVE IT BLANK - must have password).
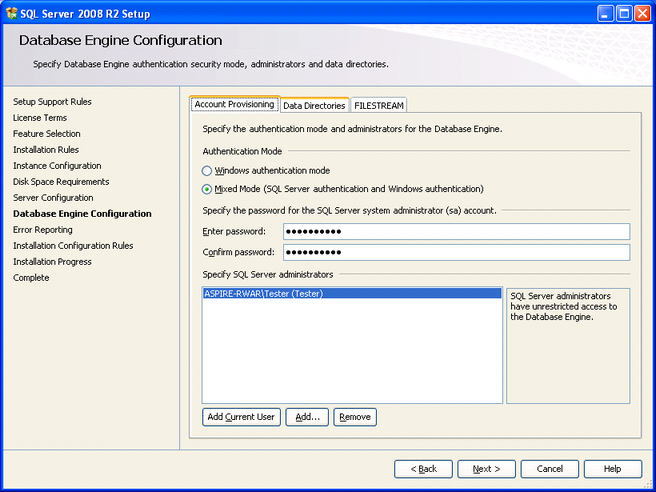
Also on this window, you can specify other users/groups to administrate the SQL database server (the currently logged-in user will already be added as an administrator). Accept the defaults under the Data Directories and FILESTREAM tabs if desired. Please note any changes made for future reference, then click on the [Next] button.
Step 8: Unless desired, don’t elect to send Windows and SQL Server error reports back to Microsoft.
Step 9: The actual installation of SQL server will initiate.
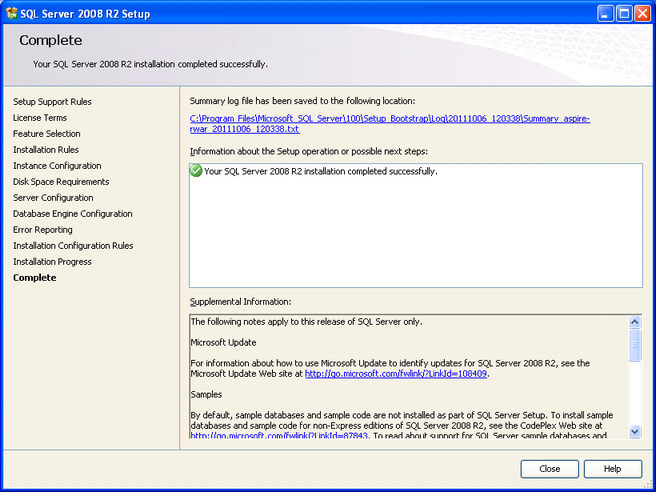
Step 10: Click on the [Close] button to complete the installation.
|
|---|
SQL Server installation is complete. You may now re-host to the SQL backend.