Configuring a custom menu item involves two components. First the menu item itself needs to be defined. We use the [Define Menu Items] button to do this. Once a menu item has been defined, it will not be displayed until it is selected for display. To do this we use the [Publish Menu Items] button.
|
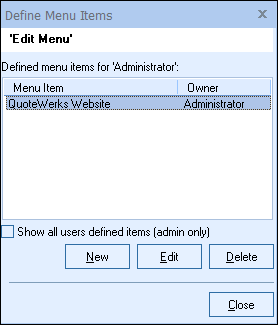
Define Menu Items
This is where you can create, edit, and delete custom menu items. All the menu items defined for the user specified on this window will be displayed.
Typically this window will be reached when the Tools -> Customize Menus menu is selected and then the [Define Menu Items] button is clicked. In this case the Menu Items will be displayed for the currently logged in user.
This window can also be reached from the Utilities -> User Maintenance menu by clicking on a user and right clicking and choosing Customize Menu Items and then clicking on the [Publish Menu Items] button. In this case, the Menu Items will be displayed for whatever user was selected.
If you have Master Rights, you will see the checkbox for “Show all users defined items (admin only)”. Checking this box will enable you to see the menus created by all users instead of just the menus owned by the user specified on this window.
Create New ‘Edit Menu’ Item
When clicking on the [New] or [Edit] button you can specify details for the custom menu item.
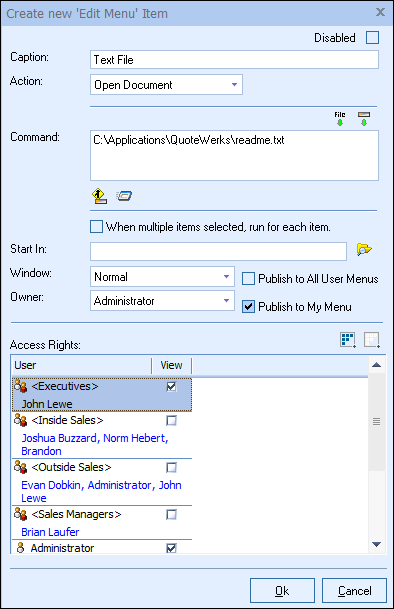
Caption
The caption is what will be displayed in your menu.
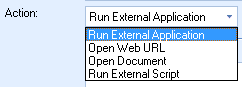
Action
There are four possible actions for the menu item:
•Run External Application: This will run an external program specified in the command field.
•Open Web URL: This will launch a website path entered into the command field.
•Open Document: This will open the document entered into the command field.
•Run External Script: This will run custom scripts you or a third-party developer have created for your QuoteWerks installation. (This requires the Corporate Edition of QuoteWerks.)
Command
The command can contain different information depending upon the selected Action. If you choose “Run External Application” or “Open Document”, you will enter the path to the file in the Command box. You can manually type it in or you can use the  button to browse to the file.
The  button will enable you to insert a QuoteWerks macro field into the Command box, such as the ManufacturerPartNumber. This macro functionality is what makes the custom menu items particularly useful because information (like the part number) about the currently selection line item in a quote or the currently selected product lookup item can be passed to the external application or website.
When the  button is clicked, all the macros in the command field will be resolved to their actual values and displayed so that you can see how the macros are being resolved and what the final command will be.
When the  button is clicked, the macros will be resolved and the selected Action (using the command value) will be run so that you can test the actual execution of the action and command from this window.
Note: The macro fields &DI_&CurrentCellName, &DI_&CurrentCellText, &DI_&CurrentCellSelectedText, &DI_&CurrentCellSelectedOrAllText are available for use, an example of their use would be to create a custom menu item called "Open in browser" in the Edit menu, set the Action to “Open a Web URL”, and in the Command use the macro &DI_&CurrentCellSelectedOrAllText. Then when you right click on any cell in the Document Items tab and choose that menu item, the selected text in the cell will be passed to your default web browser to be opened. If no text is selected, then the entire contents of the cell will be passed to the web browser. |
You can drag files, web pages, or text into the command field. So for example, if you have a Windows explorer folder open and you see the file you want to use in the command, you can drag it from Windows explorer into the Command field and it will be inserted at the location you dragged it to. Similarly, you can drag the icon displayed next to the address URL in Internet Explorer to drag that website URL into the Command field.
Menu items created for the Product Lookup Context Menu will support specialized “&PL_” macros in the command field. These macros will contain information from the currently selected product when right-clicking on a product in the Product Lookup window. They are:
&PL_VendorPartNumber, &PL_ManufacturerPartNumber, &PL_Manufacturer, &PL_UnitCost, &PL_&SelectedPDS, &PL_RecID, &PL_CustomText01, &PL_CustomText02, &PL_CustomText03, &PL_CustomText04, &PL_CustomText05, &PL_CustomText06, &PL_CustomText07, &PL_CustomText08, &PL_CustomText09, &PL_CustomText10, &PL_CustomText11, &PL_CustomText12, &PL_CustomText13, &PL_CustomText14
These macros enable an external application to be launched with the selected part number being passed to the application as a command line parameter so that the 3rd party app could perform an action based on that part number. You can also use this functionality to view product details on a website by passing the product part number as a macro in the url. Menu items created for this Product Lookup Context Menu will be displayed when any product data source product is right clicked on (subject to view rights assigned when the Menu Item is defined). Menu Items can also be created that are specific to individual product data sources. So for example a custom Menu Item will only be displayed when you right click on a product.
For example, if you right click on a product in the Tech Data Product Data Source it could run a command like "https://www.techdata.com/tools/ProductDetail/ProductDetail.aspx?P=&PL_VendorPartNumber". This would pass the VendorPartNumber from the currently selected product in the URL which would open the Tech Data website and display the Specifications and Details for the product that you have selected in QuoteWerks on the Tech Data website.
Another example would be the web URL of "https://www.google.com/products?q=&PL_ManufacturerPartNumber&price1=&price2=&PL_UnitCost&lnk=prsugg". This would perform a froogle search that will search the web to see if the selected item can be purchased for a cost lower than what you have in the database!
You can drag files, web pages, or text into the command field. So for example, if you have a Windows explorer folder open and you see the file you want to use in the command, you can drag it from Windows explorer into the Command field and it will be inserted at the location you dragged it to. Similarly, you can drag the icon displayed next to the address URL in Internet Explorer to drag that website URL into the Command field.
Start In
The “Start in” option is an advanced setting. When it is specified, it will change the currently active folder in Windows before running the command. In some cases this is useful in changing the destination of the Command’s output.
Window
The “Window” option enables you to select whether the command results open in a Normal sized window or a Maximized window.
Owner
You can specify the owner of the menu item. Only the owner of a menu item (and users with Master Rights) can modify the menu item.
Publish to All User Menus
The “Publish to All User Menus” will be available if the logged in user has Master Rights. When selected, it will automatically publish this menu for all users making it immediately visible without having to separately publish it individually to each user. This is only visible when creating new menu items.
Publish to My Menu
The checkbox for “Publish to My Menu” will automatically publish this menu for you making it immediately visible without having to separately publish it. This is only visible when creating new menu items.
Access Rights
In the Access Rights section, the owner of a menu item (or users with Master Rights) can choose which other users are allowed to View (and therefore use) the menu item owned by this user. Both users and administrators can create menu items and then specifically choose which users are allowed to have access to that menu item. This enables users to create their own menu items and to share those menu items with other users. Once a menu item has been created and made available to a user, the User can choose to include this menu item in their menus and choose the location of this menu item within the assigned root menu. Misc Access right of "CannotCreateMenuItems" is available to prevent specific users from being able to create menu items.
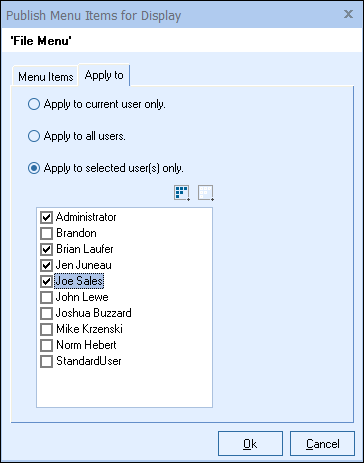
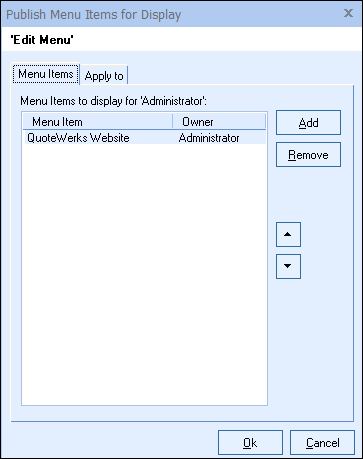
Publish Menu Items for Display
This is where you select which of the defined menu items are published for display. The menu items that are currently published are listed in the list.
Typically this window is reached when the Tools -> Customize Menus menu is selected and then the [Publish Menu Items] button is clicked. In this case the Menu Items will be displayed for the currently logged in user.
This window can also be reached from the Utilities -> User Maintenance menu by clicking on a user and right clicking and choosing Customize Menu Items and then clicking on the [Publish Menu Items] button. In this case the Menu Items will be displayed for whatever user was selected.
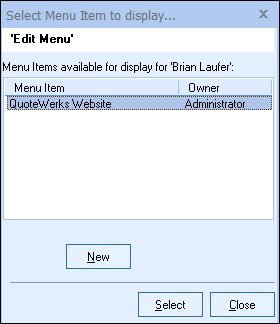
When clicking the [Add] button, can choose which additional menu items you would like to display from a list of menu items that are currently available for publishing. The [Remove] button will remove a custom menu item out of the displayed list and place it back in the available list.
Publishing Menu Items for Other Users
If you have Master Rights, then an “Apply to” tab will be visible. This will give you the option to publish the menus to the current user, all users, or to a list of selected users.