This section will take you through the steps of integrating your ACT! for Web CRM with QuoteWerks.
Important: For simplicity, we refer to the QuoteWerks integration with the web version of ACT! as "ACT! for Web" regardless of whether you are hosted on-prem or with Act! Cloud. |
Setup
Step 1: Launch QuoteWerks.
Step 2: Click Contacts -> Setup Contact Manager from the main toolbar.
Step 3: Select Act! for Web as your contact manager on the left side of the Contact Manager Setup window.
Step 4: Connection Type
Here you select your Act! For Web account type.
Step 5: Server
Act! for Web On Premise Setup
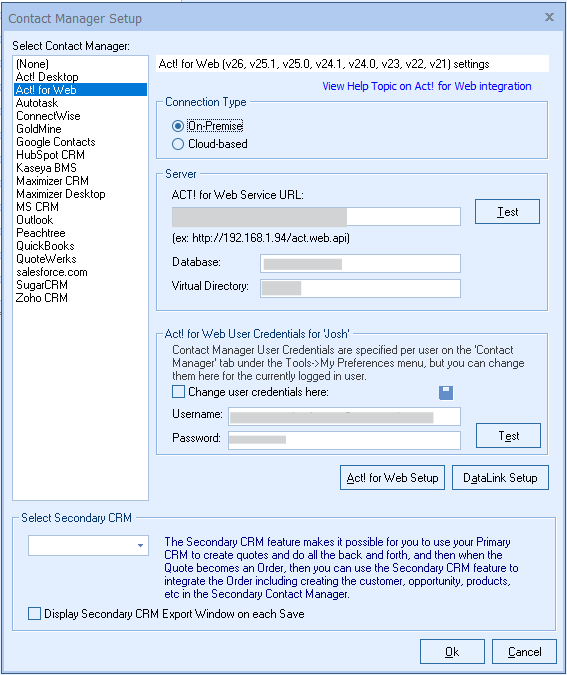
In the Act! for Web Service URL, enter the web address that you use to access your Act! for Web installation through a browser.
Enter your Act! Database Name. This is the name displayed when you first log into your Act! for Web through a browser.
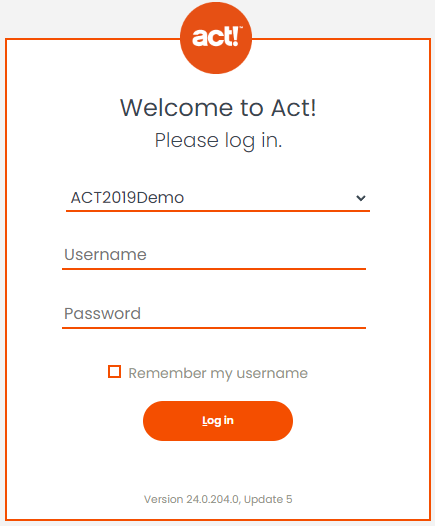
You can also find this in Act! Desktop under Help --> About Act! --> Database Information
The Virtual Directory will pre-populate with the most common location for this directory. You may need to check with your Act! for Web webserver administrator if they customized this location.
Act! for Web Cloud Setup
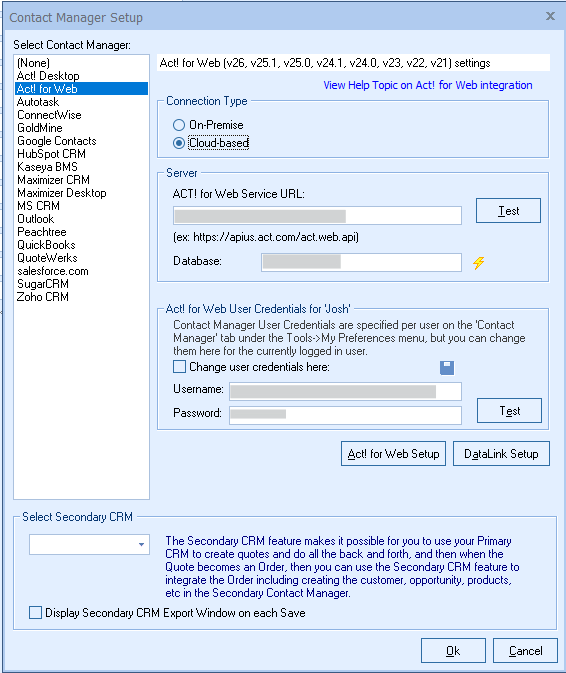
In the Act! for Web Service URL, enter the web address that is the appropriate regional API URL associated to your account. The API endpoint address depends on how you access your Act! in the Cloud database.
If you access it by going directly to its own URL (which will look similar to this: https://usp1-iis-99.hosted1.act.com/YourSiteName/), then the API endpoint takes the format of your Cloud URL suffixed with "-api/act.web.api".
For Example:
Cloud Login URL: https://usp1-iis-99.hosted1.act.com/YourSiteName/
API Endpoint: https://usp1-iis-99.hosted1.act.com/YourSiteName-api/act.web.api
However, if you access your Act in the Cloud database by using https://my.act.com then you will need to use the regional API URL associated to your account. These are as follows:
US - https://apius.act.com/act.web.api
UK - https://apiuk.act.com/act.web.api
AUS/NZ - https://apiau.act.com/act.web.api
EU/International English - https://apieu.act.com/act.web.api
Enter your database name. This can be found on the Help --> About Act! window.
|
|---|
Step 6: Act! for Web User Credentials
QuoteWerks also needs your Act! Username and Password to log into and integrate with Act!. Enter these credentials, click the Test button to verify them, then click the ![]() icon to save them.
icon to save them.
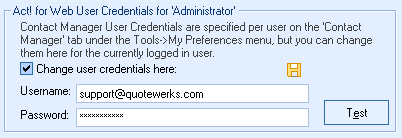
Since these are user-based credentials, you will also need to enter these on the Contact Manager tab under Tools > My Preferences, for each user setup in QuoteWerks as shown in the screen shot below.
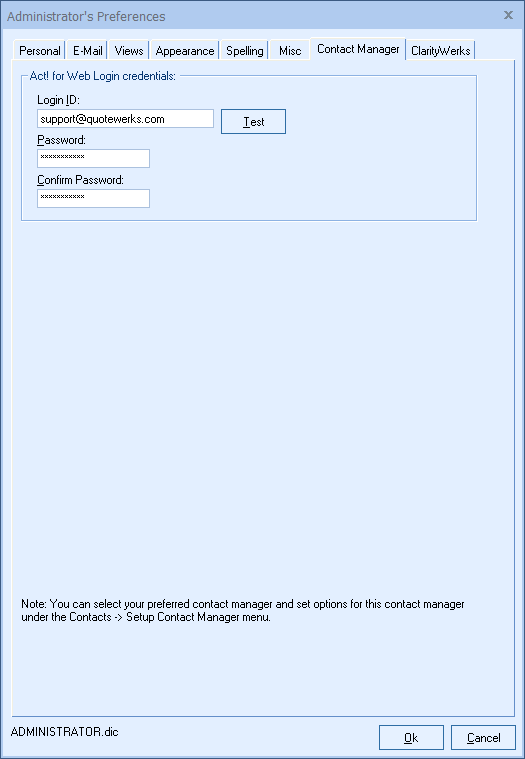
Use the Test button to verify your credentials are entered correctly.
|
The next step is to work on the Act! For Web Setup.
Once that is completed, you can move onto the DataLink Setup.